
I don't know how my Mum and I started making these. Like all great innovations, they are born out of a need and a lack of 'proper' alternative. Like all good kiwi ingenuity these were first created with the bits and pieces we found in our cupboard one day when we were needed to provide dessert.
Read More
Chocolate, Caramel and Hazelnut Tart
Also known as that time we all wanted to die after eating.
Read More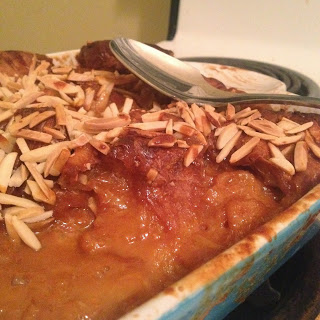
Caramel Croissant Pudding
I need to stop making pudding.
Not only will I soon turn into a big round pudding but my friends will too.
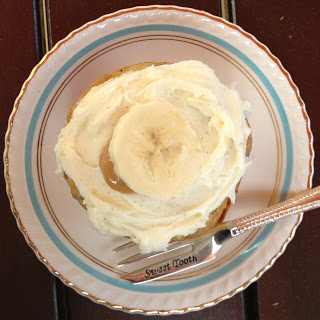
Read MoreBaby Banana and Caramel Cakes with Vanilla Bean Cream Cheese Icing
I tried to explain to my parents that baking Jack banana cakes was a sibling bonding activity and that they should appreciate the fact that we don't fight and hate each other and therefore is totally necessary.
They bought it.
Yuss another baking escapade completed without too much parental hate. Having me in the house is like living in a bakery. You get chubs. There is always cake or something delicious around to munch on. I think they enjoy it when I leave. Wait, there is no 'I think' about it. I know they love to see me hop on that plane to Dunedin where they don't have to see/live with me for months at a time.
Anyway Jack and his friend Will (Hi Will!) were going to the gym together and they needed post gym nutrition. I don't know where they got the idea that banana cake was a good option for post exercise sustenance but regardless, I was going to be the source of this cake.
Ever since receiving my Treats from Little and Friday book for Christmas I have been wanting to try something out.
The problem with this book, whilst it looks beautiful, all the recipes have hideous quantities of ingredients and last time I checked I didn't have my body weight of eggs and chocolate lying around the house. The same with the ground nuts that are required for a few of the cakes. Seriously, who can afford 4 cups of ground hazelnuts for a spot of afternoon treat baking?
The one small cake recipe that wasn't atrociously expensive to make was the mini banana cakes. They used the recipe from the Edmonds cookbook but frilled it up with a few lashing and dashings of cream cheese icing, mascarpone and caramel.
It said it would make 12 small texan muffin pan sized cakes.
Negative.
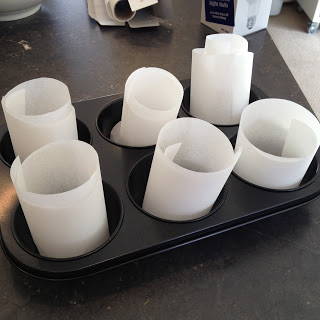
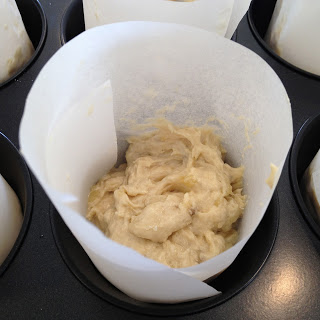
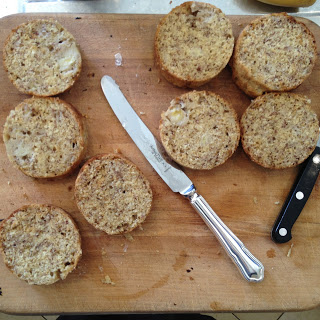
It said to use a texas muffin tin that had the sides lined up with baking paper so that the cakes could be made quite tall. I ended up making 6 smallish texas sized ones (I didn't know how far to fill them so a erred on the side of caution) and used some of the left over batter to make 3 small baby bundt ones. The batter definitely wouldn't have made 12 large ones. Awkward.
The next weridity was the amount of mashed banana the recipe required. Your standard banana cake recipe calls for around about 3 ripe bananas.
Haha but not this one.
It called for three CUPS of mashed banana. I mashed up four bananas and that only achieved one and a half cups. Who has eight bananas lying around for SIX wee cakes. I am hoping it was a typo. I only added four bananas worth. You could probably increase this to five bananas and that would make it quite moist but also a wee bit on the dense side.
I don't know about you but I am all into simple methods. Methods that are minimalist on the word front because seriously who can be bothered reading methods when there is cake to be had! The method for these had a crazy number of steps (one of which was to sift the flour into a separate bowl - uuuh extra dishes anyone?). So here I am going to condense all these steps into a more manageable and easy to read format.
The caramel I used was from a tin of condensed milk that I had boiled away (in the sealed tin!) for three hours rather than boiling sugar and cream etc for which you need a candy thermometer (which I don't). I boil up around three tins at a time and then keep them in the cupboard for when we need it.We also didn't happen to have any mascarpone in the fridge so I left that out too.
I think it is cake time.
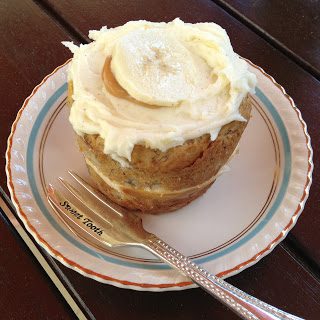
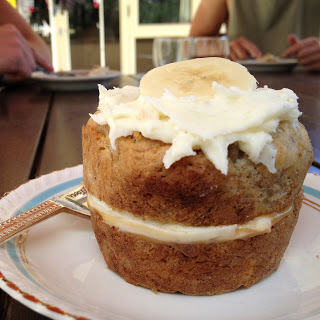
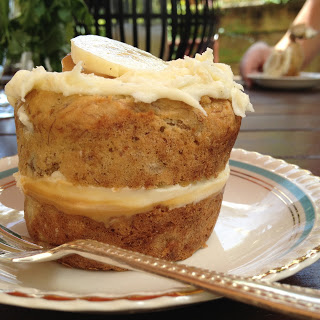
Individual Banana Cakes with Caramel and Vanilla Bean Cream Cheese Icing
Adapted from Treats from and Little and Friday
Makes 8
125g butter, softened
3/4 cup caster sugar
2 large eggs
5 very ripe bananas, mashed
2 cups flour
1 teaspoon baking powder
1 teaspoon baking soda
4 tablespoons hot milk
Cream cheese icing:
30g butter, softened
50g cream cheese
3 cups icing sugar
1/2 teaspoon vanilla bean paste (or one teaspoon vanilla essence)
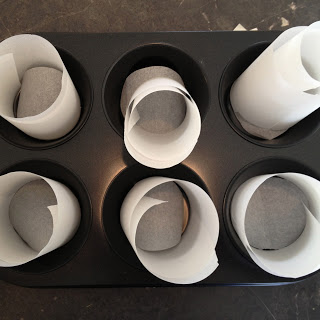
Preheat the oven to 160 degrees on bake. Line a texas sized muffin tin with baking paper. Cut a circle for the bottom then a long strip around 25cm long and 10cm wide and place that around the edges of the tins. Make sure the strip is long enough to overlap at the ends when in the tin. It will stand up in a tall cylinder but as you place the cake batter into it it will stretch out and line the edges of the tin exactly.
Cream together the butter and sugar until light and fluffy. Beat in the eggs one at a time then continue to beat until fluffy and voluminous.
Beat in the mashed banana.
Dissolve the baking soda in the hot milk.
Gently fold in the milk and sieved flour and baking soda in three equal lots.
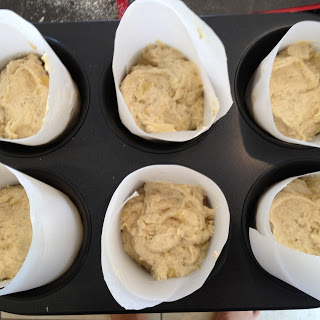
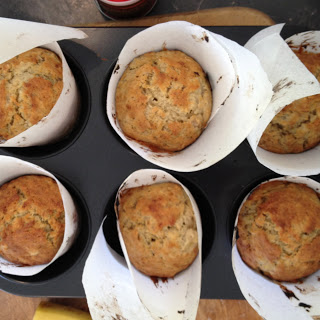
Divide the mixture evenly between the tins. If you want really tall cakes then you may only get 6 but the shorter ones may be better if you or your guests aren't very good at tackling huge quantities of sickly sweet food.
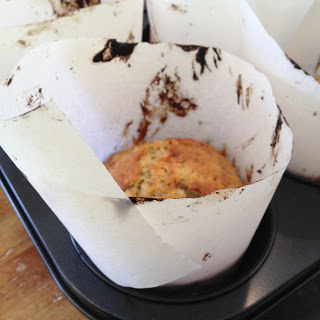
Bake for 25-30 minutes or until a skewer comes out clean. Leave to cool before removing from tins and removing baking paper.
To make the cream cheese icing, cream together all the ingredients until light and fluffy.
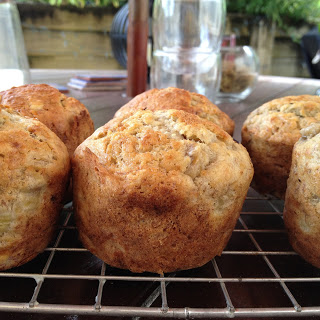
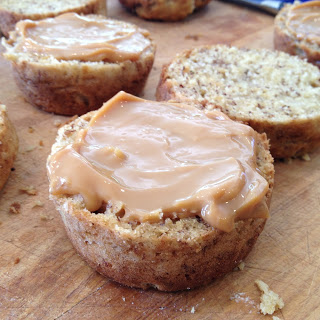
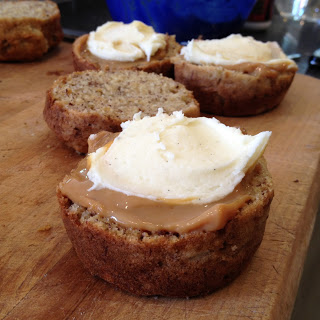
To assemble the cakes, cut the cakes in half horizontally. You may need to level the tops of the cakes if they have domed substantially. Spread around two teaspoons of caramel over the base of the cakes then follow with a good dollop of the cream cheese icing. To the top layers, spread over the cream cheese icing followed by a small drop of caramel. Place the top halves onto their matching bottoms. Garnish with a slice or two of banana or some banana chips if you wish.
Enjoy! :)
They bought it.
Yuss another baking escapade completed without too much parental hate. Having me in the house is like living in a bakery. You get chubs. There is always cake or something delicious around to munch on. I think they enjoy it when I leave. Wait, there is no 'I think' about it. I know they love to see me hop on that plane to Dunedin where they don't have to see/live with me for months at a time.
Anyway Jack and his friend Will (Hi Will!) were going to the gym together and they needed post gym nutrition. I don't know where they got the idea that banana cake was a good option for post exercise sustenance but regardless, I was going to be the source of this cake.
Ever since receiving my Treats from Little and Friday book for Christmas I have been wanting to try something out.
The problem with this book, whilst it looks beautiful, all the recipes have hideous quantities of ingredients and last time I checked I didn't have my body weight of eggs and chocolate lying around the house. The same with the ground nuts that are required for a few of the cakes. Seriously, who can afford 4 cups of ground hazelnuts for a spot of afternoon treat baking?
The one small cake recipe that wasn't atrociously expensive to make was the mini banana cakes. They used the recipe from the Edmonds cookbook but frilled it up with a few lashing and dashings of cream cheese icing, mascarpone and caramel.
It said it would make 12 small texan muffin pan sized cakes.
Negative.
It said to use a texas muffin tin that had the sides lined up with baking paper so that the cakes could be made quite tall. I ended up making 6 smallish texas sized ones (I didn't know how far to fill them so a erred on the side of caution) and used some of the left over batter to make 3 small baby bundt ones. The batter definitely wouldn't have made 12 large ones. Awkward.
The next weridity was the amount of mashed banana the recipe required. Your standard banana cake recipe calls for around about 3 ripe bananas.
Haha but not this one.
It called for three CUPS of mashed banana. I mashed up four bananas and that only achieved one and a half cups. Who has eight bananas lying around for SIX wee cakes. I am hoping it was a typo. I only added four bananas worth. You could probably increase this to five bananas and that would make it quite moist but also a wee bit on the dense side.
I don't know about you but I am all into simple methods. Methods that are minimalist on the word front because seriously who can be bothered reading methods when there is cake to be had! The method for these had a crazy number of steps (one of which was to sift the flour into a separate bowl - uuuh extra dishes anyone?). So here I am going to condense all these steps into a more manageable and easy to read format.
The caramel I used was from a tin of condensed milk that I had boiled away (in the sealed tin!) for three hours rather than boiling sugar and cream etc for which you need a candy thermometer (which I don't). I boil up around three tins at a time and then keep them in the cupboard for when we need it.We also didn't happen to have any mascarpone in the fridge so I left that out too.
I think it is cake time.
Individual Banana Cakes with Caramel and Vanilla Bean Cream Cheese Icing
Adapted from Treats from and Little and Friday
Makes 8
125g butter, softened
3/4 cup caster sugar
2 large eggs
5 very ripe bananas, mashed
2 cups flour
1 teaspoon baking powder
1 teaspoon baking soda
4 tablespoons hot milk
Cream cheese icing:
30g butter, softened
50g cream cheese
3 cups icing sugar
1/2 teaspoon vanilla bean paste (or one teaspoon vanilla essence)
Preheat the oven to 160 degrees on bake. Line a texas sized muffin tin with baking paper. Cut a circle for the bottom then a long strip around 25cm long and 10cm wide and place that around the edges of the tins. Make sure the strip is long enough to overlap at the ends when in the tin. It will stand up in a tall cylinder but as you place the cake batter into it it will stretch out and line the edges of the tin exactly.
Cream together the butter and sugar until light and fluffy. Beat in the eggs one at a time then continue to beat until fluffy and voluminous.
Beat in the mashed banana.
Dissolve the baking soda in the hot milk.
Gently fold in the milk and sieved flour and baking soda in three equal lots.
Divide the mixture evenly between the tins. If you want really tall cakes then you may only get 6 but the shorter ones may be better if you or your guests aren't very good at tackling huge quantities of sickly sweet food.
Bake for 25-30 minutes or until a skewer comes out clean. Leave to cool before removing from tins and removing baking paper.
To make the cream cheese icing, cream together all the ingredients until light and fluffy.
To assemble the cakes, cut the cakes in half horizontally. You may need to level the tops of the cakes if they have domed substantially. Spread around two teaspoons of caramel over the base of the cakes then follow with a good dollop of the cream cheese icing. To the top layers, spread over the cream cheese icing followed by a small drop of caramel. Place the top halves onto their matching bottoms. Garnish with a slice or two of banana or some banana chips if you wish.
Enjoy! :)
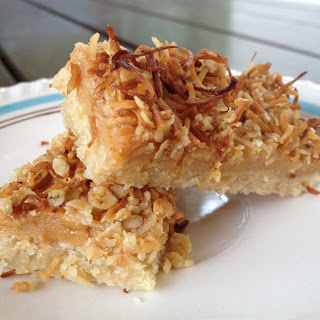
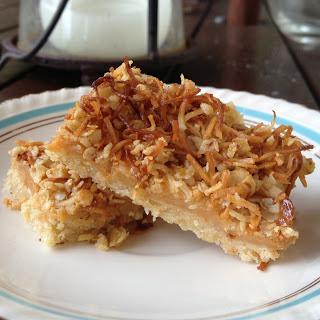
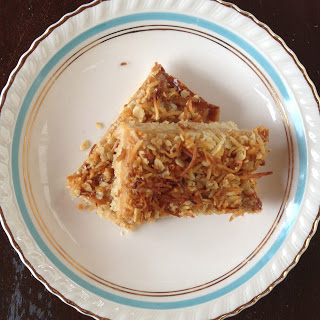
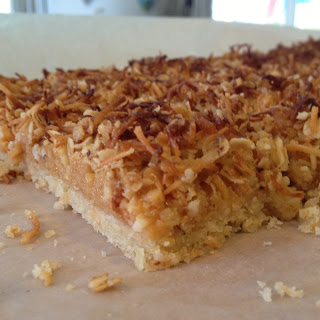
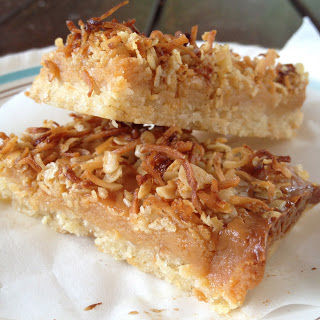
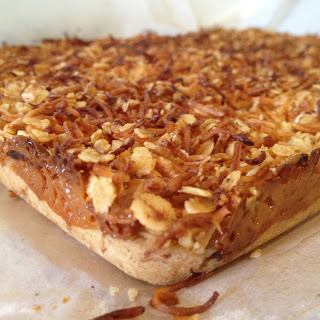
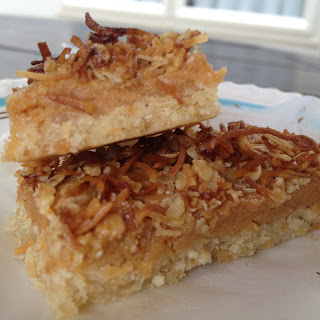
Caramel Oat Bars
With emphasis on the caramel.
Imagine you are a slice living in my house. Your main goal in life as a slice is to be eaten but more importantly is to win the affection of me, Sophie so I will make you over and over again. How does a slice win my affections? Well the same way anyone does; with chocolate, caramel and enough sugar to turn a health freak into a diabetic in one bite.
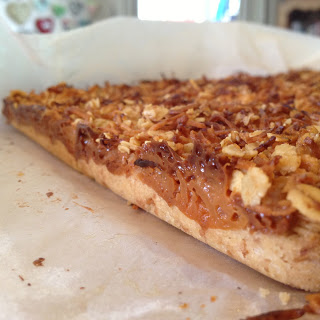
This slice is a winner, no doubt about that. Sure the others I have posted about have the chocolate and the sugar aspects and are delicious but few slices can compare to one that is layered and within those layers lies a gooey caramel centre.
In the flurry of all these new slices that Mum and I have been finding recipes for I forgot about my old favourite, my turn to, my staple to impress. I am blaming my Christmas bakewell and birdseed slice for this.
Rewind back to last January and I was making this caramel oaty slice as well as my lemon krummeltorte slice at least once a week to take to friends places or as thank yous to people for letting me stay at their houses over the holidays.
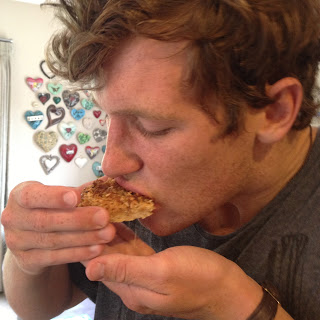
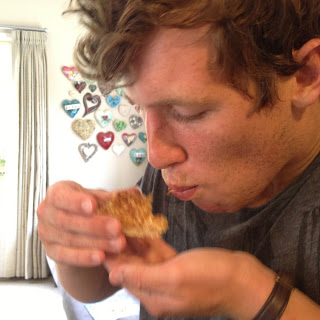
I made this slice for my brother to take as a thank you for his friend Drew's parents for letting him stay a couple of nights in Tairua with them. It was this or the brownie and I was not in the mood to battle with sticky chocolatey brownie mixture.
Its pretty easy, in fact it is very difficult to get wrong unless you burn it (ok which I sort of did) or burn the caramel.
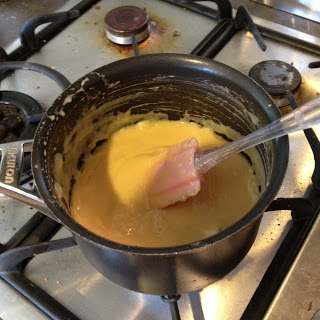
Don't let me fool you, this isn't fiddly, candy thermometer requiring caramel. This is can of condensed milk + butter + golden syrup + saucepan caramel. Easy as. Unless your tin of condensed milk decides it wants to be far runnier than usual leaving you confused and wondering whether or not it will thicken to produce a delicious caramel.
Perseverance and sheer laziness to go down to the shops and buy a new tin paid off. The caramel thickened and the day was saved.
This slice requires three components; the oath base, the caramel filling and the coconut topping.
Usually when I see things that have components I flick the page and look for something less ingredient hungry.
But this slice is different. And well worth it.
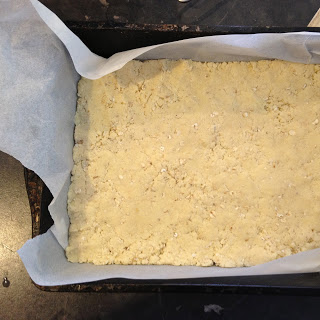
I chose to cook my base slightly longer than it says too, this made it really nice and crunchy. If you are into more cakey slices with a softer base then only cook it for ten minutes. The end result is still delicious.
Caramel Oat Bars
Source of this glorious creation completely unknown
Makes a thin 20x30cm slice
Base:
100g butter, softened
1/2 cup sugar
1 teaspoon vanilla
1 cup flour
1/2 cup desiccated coconut
1/2 cup rolled oats
Caramel:
395g tin of full fat, full sugar condensed milk
50g butter
2 tablespoons golden syrup
Topping:
1 cup threaded coconut
1/2 cup rolled oats
50g butter
1 tablespoon golden syrup
Preheat the oven to 180 degrees on bake and line a 20x30cm (or smaller) baking tin with baking paper.
Cream together the butter, sugar and vanilla until light and fluffy. Sieve in the flour the mix then add in the oats and the coconut.
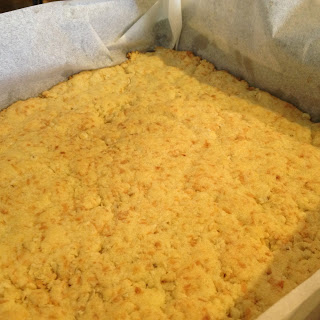
Press firmly into the base of the lined tin and then bake for 10 (soft) to 15 (crunchier) minutes. Once baked, remove to cool while you make the caramel.
Place all the caramel ingredients into a saucepan and stir over a low to medium heat until the contents has turned a dark golden colour and has thickened. This should take 3 - 5 minutes.
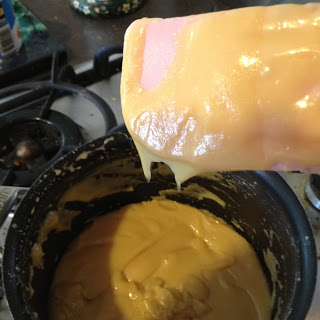
Spread the caramel over the base.
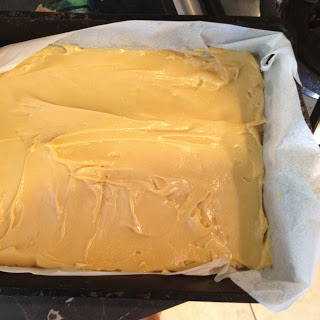
To make the topping, place the butter and golden syrup in a saucepan and melt together. Add in the coconut and oats and stir until well coated.
Sprinkle the topping over the caramel and base.
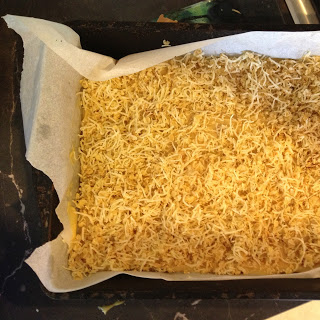
Bake in the oven for a further 10-15 minutes or until the topping has turned crisp and golden in colour.
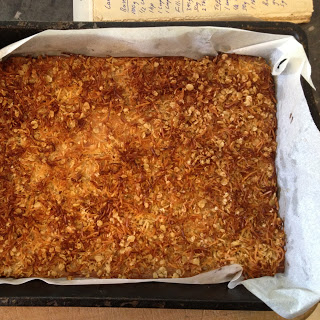
Once cold, cut into bars or squares.
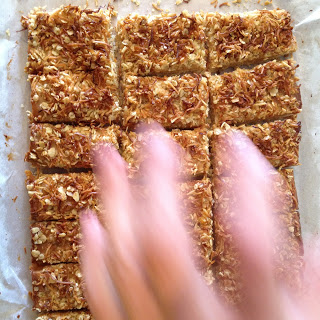
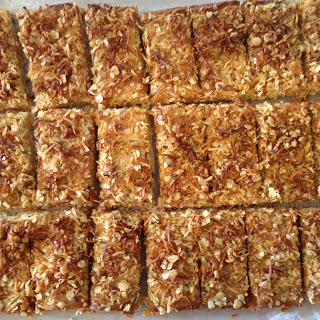
Enjoy!
Imagine you are a slice living in my house. Your main goal in life as a slice is to be eaten but more importantly is to win the affection of me, Sophie so I will make you over and over again. How does a slice win my affections? Well the same way anyone does; with chocolate, caramel and enough sugar to turn a health freak into a diabetic in one bite.
This slice is a winner, no doubt about that. Sure the others I have posted about have the chocolate and the sugar aspects and are delicious but few slices can compare to one that is layered and within those layers lies a gooey caramel centre.
In the flurry of all these new slices that Mum and I have been finding recipes for I forgot about my old favourite, my turn to, my staple to impress. I am blaming my Christmas bakewell and birdseed slice for this.
Rewind back to last January and I was making this caramel oaty slice as well as my lemon krummeltorte slice at least once a week to take to friends places or as thank yous to people for letting me stay at their houses over the holidays.
I made this slice for my brother to take as a thank you for his friend Drew's parents for letting him stay a couple of nights in Tairua with them. It was this or the brownie and I was not in the mood to battle with sticky chocolatey brownie mixture.
Its pretty easy, in fact it is very difficult to get wrong unless you burn it (ok which I sort of did) or burn the caramel.
Don't let me fool you, this isn't fiddly, candy thermometer requiring caramel. This is can of condensed milk + butter + golden syrup + saucepan caramel. Easy as. Unless your tin of condensed milk decides it wants to be far runnier than usual leaving you confused and wondering whether or not it will thicken to produce a delicious caramel.
Perseverance and sheer laziness to go down to the shops and buy a new tin paid off. The caramel thickened and the day was saved.
This slice requires three components; the oath base, the caramel filling and the coconut topping.
Usually when I see things that have components I flick the page and look for something less ingredient hungry.
But this slice is different. And well worth it.
I chose to cook my base slightly longer than it says too, this made it really nice and crunchy. If you are into more cakey slices with a softer base then only cook it for ten minutes. The end result is still delicious.
Caramel Oat Bars
Source of this glorious creation completely unknown
Makes a thin 20x30cm slice
Base:
100g butter, softened
1/2 cup sugar
1 teaspoon vanilla
1 cup flour
1/2 cup desiccated coconut
1/2 cup rolled oats
Caramel:
395g tin of full fat, full sugar condensed milk
50g butter
2 tablespoons golden syrup
Topping:
1 cup threaded coconut
1/2 cup rolled oats
50g butter
1 tablespoon golden syrup
Preheat the oven to 180 degrees on bake and line a 20x30cm (or smaller) baking tin with baking paper.
Cream together the butter, sugar and vanilla until light and fluffy. Sieve in the flour the mix then add in the oats and the coconut.
Press firmly into the base of the lined tin and then bake for 10 (soft) to 15 (crunchier) minutes. Once baked, remove to cool while you make the caramel.
Place all the caramel ingredients into a saucepan and stir over a low to medium heat until the contents has turned a dark golden colour and has thickened. This should take 3 - 5 minutes.
Spread the caramel over the base.
To make the topping, place the butter and golden syrup in a saucepan and melt together. Add in the coconut and oats and stir until well coated.
Sprinkle the topping over the caramel and base.
Bake in the oven for a further 10-15 minutes or until the topping has turned crisp and golden in colour.
Once cold, cut into bars or squares.
Enjoy!
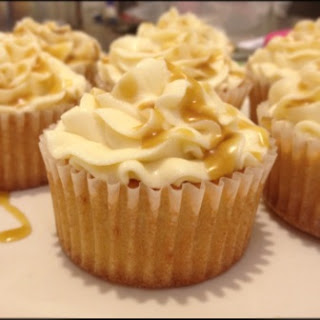
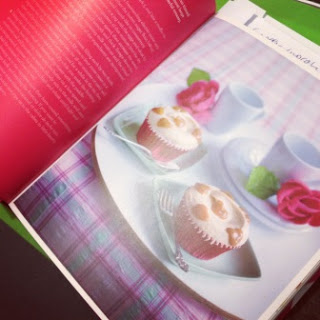
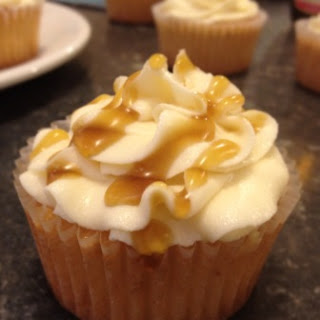
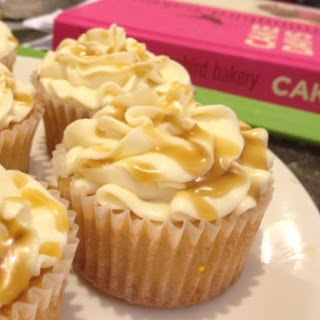
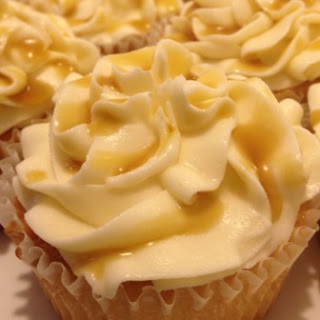
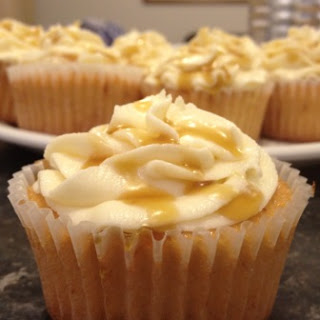
Caramel Cupcakes: A rainy day treat
Good rainy evening!
Wow sure is pouring down out there in dear old Dunedin. There is something about wet miserable weather that gives me this sense of 'you can eat whatever the hell you like, the calories don't count; it's raining'. Do you guys get that?
Anyway I had some of the caramel I made for my sticky date cupcakes left over in the fridge as well as some left over icing. I had to use them up! Waste not, want not!
Ohhh guess what!!! Exciting!! Exciting!!! (No Alix, it's not Taylor Swift's new single). I bought the Hummingbird Bakery App! Now I can have my favourite baking cookbook permenantly in my pocket so I cant have easy access and impromptu baking sessions!
EXCIIITTTINNGGG!!! I reccommend you get it. It's super cool!!
Right, enough of that. It's cupcake time.
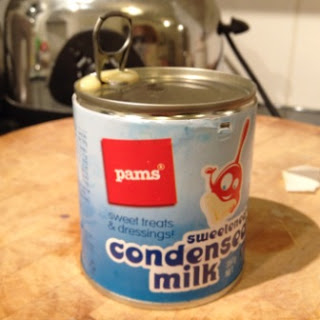
This recipe is basically just a plain vanilla recipe with the addition of caramel. The recipe says to use dulche de leche, a South American tinned caramel. Unfortunately that sells in the international isle at New World for $8.99. A bit out of range for a casual baking session. They also suggest normal tinned caramel as a substitute. I dunno about you but I find the highlander tinned condensed milk caramel a bit weird tasting. Jamie Oliver suggests placing tins of condensed milk, unopened, in a high sided pot filled with boiling water and leaving them to cook for three hours. Apparently this turns the condensed milk into a caramel. I am keen to try that. I didn't know this at the time I made my sticky date cupcakes so I just made up a normal caramel filling recipe that I use in my caramel slices, it's here under my sticky date cupcake post.
Caramel Cupcakes (Hummingbird Bakery's Cake Days book)
Makes 12-15
40g softened butter
140g castor sugar
120g sieved flour
1 1/2 teaspoons baking powder
1 egg, room temperature
1/2 cup whole milk
1 teaspoon vanilla essence
75g (I sneakily used 100g) of dulche le leche or normal caramel
Icing
300g icing sugar, sieved
60g butter, softened
25ml whole milk
75g dulche de leche or caramel
Preheat the oven to 170 degrees, bake.
In a bowl, beat the butter, sugar, flour and baking powder together until it becomes a sandy consistency. Once all the lumps are removed, pour in the milk and vanilla and beat until smooth. Crack in the egg and beat until smooth and fluffy. Add the caramel and beat until incorporated.
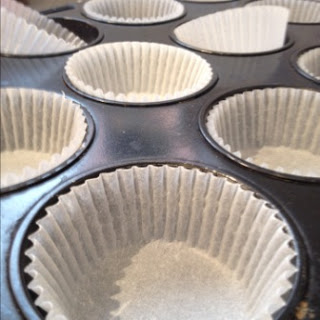
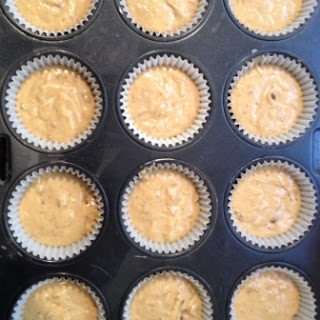
Spoon into paper cases in a muffin tray until 2/3 full.
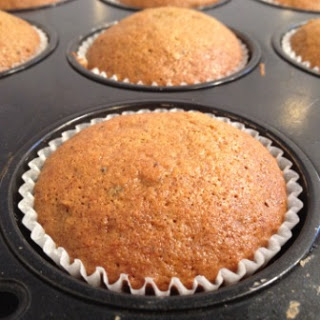
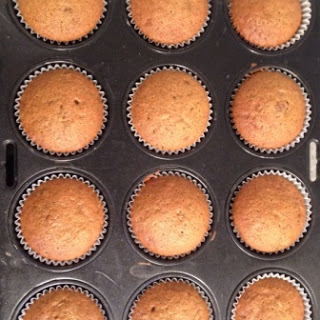
Bake for 18-20 minutes or until the tops are golden and the tops spring back when you press them. Leave them to cool slightly before turning out into a wire rack. Leave to cool completely before icing.
Beat the butter, sieved icing sugar and milk until light and fluffy. You may need to add more milk to smooth it out. Add the caramel and beat until smooth. I found I needed to add a bit more icing sugar to thicken it up. The caramel can cause it to become slightly sloppy and if you want to pipe it out nicely you need it to form really stiff peaks otherwise they will slop down.
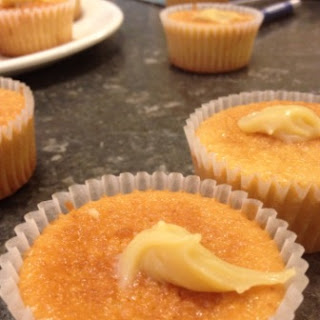
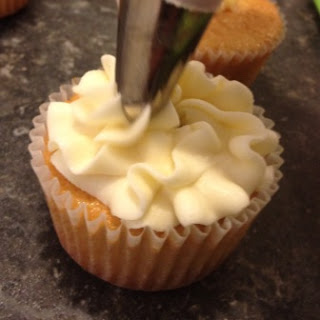
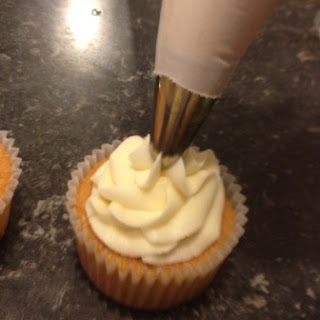
Place a small spoon of caramel on each cupcake, pipe the icing using a 1M tip (or however you want) then drizzle over some more runny caramel or golden syrup. Nom nom nom.
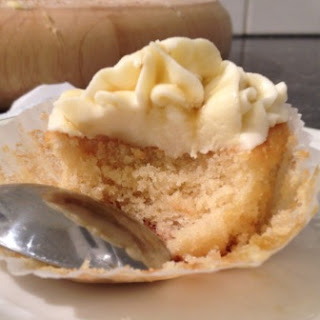
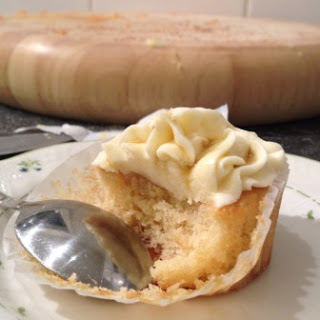
I recommend you eat at least all of them instantly.
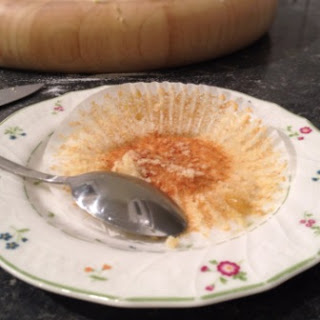
Excellent!
Happy rainy day!!
Wow sure is pouring down out there in dear old Dunedin. There is something about wet miserable weather that gives me this sense of 'you can eat whatever the hell you like, the calories don't count; it's raining'. Do you guys get that?
Anyway I had some of the caramel I made for my sticky date cupcakes left over in the fridge as well as some left over icing. I had to use them up! Waste not, want not!
Ohhh guess what!!! Exciting!! Exciting!!! (No Alix, it's not Taylor Swift's new single). I bought the Hummingbird Bakery App! Now I can have my favourite baking cookbook permenantly in my pocket so I cant have easy access and impromptu baking sessions!
EXCIIITTTINNGGG!!! I reccommend you get it. It's super cool!!
Right, enough of that. It's cupcake time.
This recipe is basically just a plain vanilla recipe with the addition of caramel. The recipe says to use dulche de leche, a South American tinned caramel. Unfortunately that sells in the international isle at New World for $8.99. A bit out of range for a casual baking session. They also suggest normal tinned caramel as a substitute. I dunno about you but I find the highlander tinned condensed milk caramel a bit weird tasting. Jamie Oliver suggests placing tins of condensed milk, unopened, in a high sided pot filled with boiling water and leaving them to cook for three hours. Apparently this turns the condensed milk into a caramel. I am keen to try that. I didn't know this at the time I made my sticky date cupcakes so I just made up a normal caramel filling recipe that I use in my caramel slices, it's here under my sticky date cupcake post.
Caramel Cupcakes (Hummingbird Bakery's Cake Days book)
Makes 12-15
40g softened butter
140g castor sugar
120g sieved flour
1 1/2 teaspoons baking powder
1 egg, room temperature
1/2 cup whole milk
1 teaspoon vanilla essence
75g (I sneakily used 100g) of dulche le leche or normal caramel
Icing
300g icing sugar, sieved
60g butter, softened
25ml whole milk
75g dulche de leche or caramel
Preheat the oven to 170 degrees, bake.
In a bowl, beat the butter, sugar, flour and baking powder together until it becomes a sandy consistency. Once all the lumps are removed, pour in the milk and vanilla and beat until smooth. Crack in the egg and beat until smooth and fluffy. Add the caramel and beat until incorporated.
Spoon into paper cases in a muffin tray until 2/3 full.
Bake for 18-20 minutes or until the tops are golden and the tops spring back when you press them. Leave them to cool slightly before turning out into a wire rack. Leave to cool completely before icing.
Beat the butter, sieved icing sugar and milk until light and fluffy. You may need to add more milk to smooth it out. Add the caramel and beat until smooth. I found I needed to add a bit more icing sugar to thicken it up. The caramel can cause it to become slightly sloppy and if you want to pipe it out nicely you need it to form really stiff peaks otherwise they will slop down.
Place a small spoon of caramel on each cupcake, pipe the icing using a 1M tip (or however you want) then drizzle over some more runny caramel or golden syrup. Nom nom nom.
I recommend you eat at least all of them instantly.
Excellent!
Happy rainy day!!
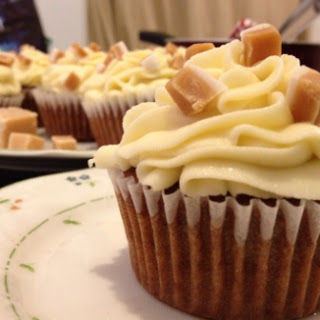
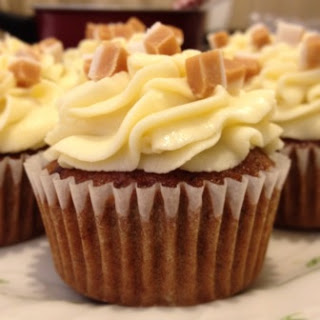
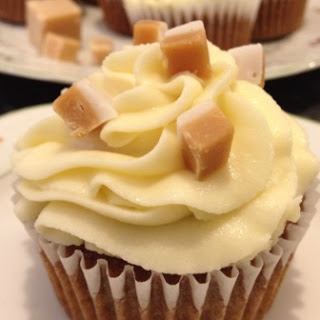
Sticky Date Toffee Cupcakes
Hi there!
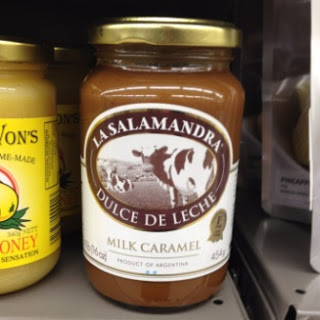
So I got bored this afternoon and my baking itch wasn't satisfied with just the carrot cake I had made. I flipped through my Hummingbird Bakery Cakes Days book that Chris bought me (best present ever) and found this recipe for sticky date and caramel cupcakes. I was originally put off because they used this it called for an ingredient for dulche de leche, which is a South American tinned milk caramel. I found this at the Centre City New World but it was a hefty $8.99. Instead I bought a tin of condensed milk and made my own version on the stove top. (Right next to it, in the picture is the best lemon honey/curd you can buy in a jar! Aunty Von's, I highly recommend it).
I like sticky date pudding. I like it a lot. It is so moist and delicious, especially when drowned in caramel sauce and a bit dollop of sloppy whipped cream on top. As cupcakes, these are pretty close to the real deal. You include some of the caramel you made into the icing so the light and fluffy icing has a hint of caramel to it.
The other day I saw that you could buy caramel food flavouring in the baking isle now. That is pretty cool. If you were feeling a bit poor you could probably substitute the caramel in the icing for a few drops of essence. I might go and invest in some tomorrow.
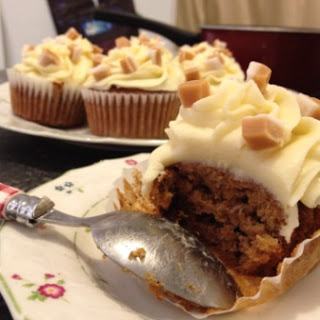
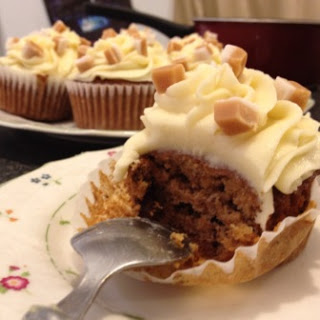
What you cant substitute the essence for is the gooey layer of caramel that hides between the sponge and the icing. When you bite into it, it oozes outwards and all over the exposed sponge. Only one word can describe the deliciousness; NOMMMM.
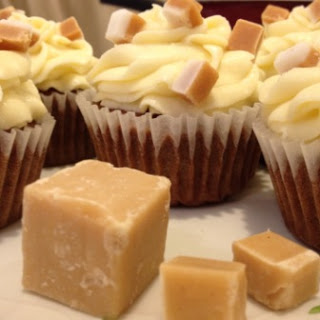
Oh and if you want to make this even worse for you, top it all off with some pieces of caramel sprinkled over the top. It's worth it. I promise.
And just a special shout out to my brand new handbeater! Courtesy of Mum and Dad. I am sad to announce the passing of my dear old friend. He came to me second hand from my Mother and we had many happy memories together. Unfortunately he came to a very grinding halt. I shall miss him.
So anyway this is my new beater's maiden voyage :)
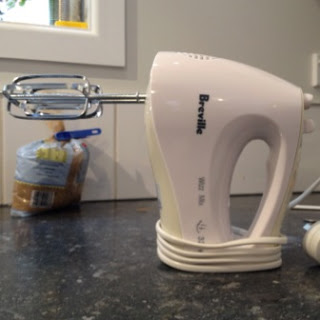
It's still so clean!
Hummingbird's Sticky Toffee Cupcakes
For the cupcake:
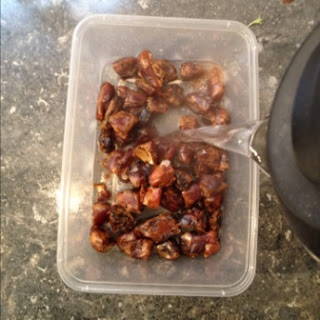
180g chopped dried dates
180 ml boiling water
80g unsalted butter, softened
150g soft brown sugar
2 large eggs
180g plain flour
1/2 teaspoon baking powder
1 teaspoon baking soda
1/4 teaspoon salt
1 teaspoon vanilla essence
For the caramel:
375g (1 tin) condensed milk
50g butter, chopped into small pieces
4 tablespoons golden syrup
For the icing:
80g butter, softened
400g icing sugar, sieved
3 tablespoons whole milk
100g caramel or dulche de leche
Cupcakes:
Preheat the oven to 190 degrees Celsius on bake.
First soak the dates in the boiling water for 20 minutes (if you are impatient like me pop them in the microwave for 1 minute to help speed up the process).
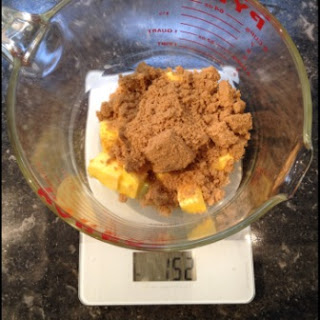
Cream together the butter and sugar until pale brown in colour and fluffy in consistency.
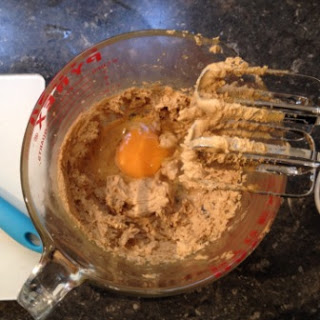
Add the eggs, one at a time, beating well between each addition. Beat until the mixture roughly doubles in volume.
Sift together the flour, baking powder, baking soda and salt. Add this dry mix into the butter, sugar and egg mix in thirds, beating after each addition. Beat until the batter is smooth and even.
Add the vanilla to the water and date mix. Pour all of this into the rest of the mixture. Mix by hand until the dates and water are incorporated.
Line a muffin tray with cupcake cases and fill them 2/3 full.
Bake for 18 minutes or until they spring back when touched. Leave to cool slightly before turning out onto a wire rack or clean tea towel.
Caramel:
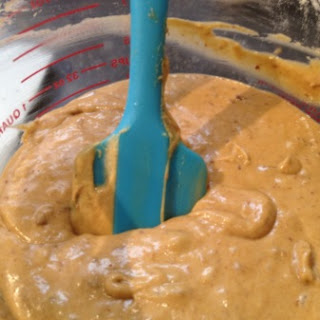
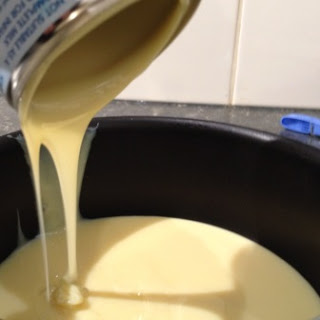
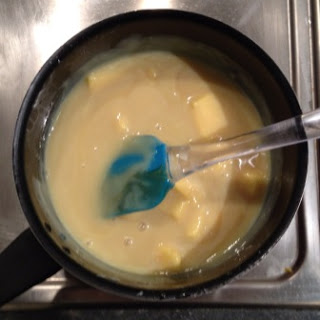
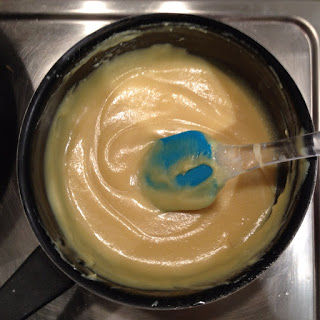
In a small saucepan, heat the condensed milk, butter and golden syrup together on a medium heat. Stirring regularly. Heat until the butter has melted and has been incorporated into the condensed milk. Keep heating and stirring until it turns a darker tan colour (a wee bit darker than the photo below) and becomes quite thick. Take it off the heat and leave it to cool.
Icing:
Cream the butter and a small amount of the sieved icing sugar. Keep adding icing sugar slowly, adding milk in between additions to moisten the mixture. If the mixture is too stiff, add a splash more milk. Add more icing sugar if it is too sloppy. Next add the caramel.I found that after the addition of the caramel the icing becomes quite soft and a bit more icing sugar was needed to stiffen it up again. Beat until fluffy and smooth.
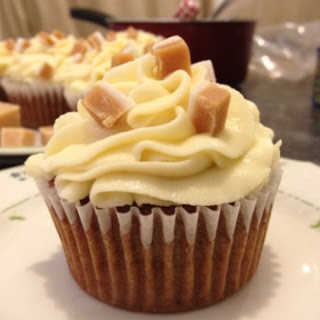
Place a small dollop of the left over caramel onto the top of each cupcake. Next place the icing into a piping bag fitted with a Wilton 1M tip (or equivalent). Starting at the outer edge, squeeze the piping bag and start and inward spiral, overlapping the previous circle ever so slightly. Swirl around and up, moving the nozzle up and down quickly at the top to release the peak from the nozzle. sprinkle over a few caramel pieces (I used jersey caramels) and you are good to go.


Do give these a go, they are not that difficult actually. A few components to think about but the left over jar of caramel sitting in our fridge is well worth the effort!
See you later! :)
So I got bored this afternoon and my baking itch wasn't satisfied with just the carrot cake I had made. I flipped through my Hummingbird Bakery Cakes Days book that Chris bought me (best present ever) and found this recipe for sticky date and caramel cupcakes. I was originally put off because they used this it called for an ingredient for dulche de leche, which is a South American tinned milk caramel. I found this at the Centre City New World but it was a hefty $8.99. Instead I bought a tin of condensed milk and made my own version on the stove top. (Right next to it, in the picture is the best lemon honey/curd you can buy in a jar! Aunty Von's, I highly recommend it).
I like sticky date pudding. I like it a lot. It is so moist and delicious, especially when drowned in caramel sauce and a bit dollop of sloppy whipped cream on top. As cupcakes, these are pretty close to the real deal. You include some of the caramel you made into the icing so the light and fluffy icing has a hint of caramel to it.
The other day I saw that you could buy caramel food flavouring in the baking isle now. That is pretty cool. If you were feeling a bit poor you could probably substitute the caramel in the icing for a few drops of essence. I might go and invest in some tomorrow.
What you cant substitute the essence for is the gooey layer of caramel that hides between the sponge and the icing. When you bite into it, it oozes outwards and all over the exposed sponge. Only one word can describe the deliciousness; NOMMMM.
Oh and if you want to make this even worse for you, top it all off with some pieces of caramel sprinkled over the top. It's worth it. I promise.
And just a special shout out to my brand new handbeater! Courtesy of Mum and Dad. I am sad to announce the passing of my dear old friend. He came to me second hand from my Mother and we had many happy memories together. Unfortunately he came to a very grinding halt. I shall miss him.
So anyway this is my new beater's maiden voyage :)
It's still so clean!
Hummingbird's Sticky Toffee Cupcakes
For the cupcake:
180g chopped dried dates
180 ml boiling water
80g unsalted butter, softened
150g soft brown sugar
2 large eggs
180g plain flour
1/2 teaspoon baking powder
1 teaspoon baking soda
1/4 teaspoon salt
1 teaspoon vanilla essence
For the caramel:
375g (1 tin) condensed milk
50g butter, chopped into small pieces
4 tablespoons golden syrup
For the icing:
80g butter, softened
400g icing sugar, sieved
3 tablespoons whole milk
100g caramel or dulche de leche
Cupcakes:
Preheat the oven to 190 degrees Celsius on bake.
First soak the dates in the boiling water for 20 minutes (if you are impatient like me pop them in the microwave for 1 minute to help speed up the process).
Cream together the butter and sugar until pale brown in colour and fluffy in consistency.
Add the eggs, one at a time, beating well between each addition. Beat until the mixture roughly doubles in volume.
Sift together the flour, baking powder, baking soda and salt. Add this dry mix into the butter, sugar and egg mix in thirds, beating after each addition. Beat until the batter is smooth and even.
Add the vanilla to the water and date mix. Pour all of this into the rest of the mixture. Mix by hand until the dates and water are incorporated.
Line a muffin tray with cupcake cases and fill them 2/3 full.
Bake for 18 minutes or until they spring back when touched. Leave to cool slightly before turning out onto a wire rack or clean tea towel.
Caramel:
In a small saucepan, heat the condensed milk, butter and golden syrup together on a medium heat. Stirring regularly. Heat until the butter has melted and has been incorporated into the condensed milk. Keep heating and stirring until it turns a darker tan colour (a wee bit darker than the photo below) and becomes quite thick. Take it off the heat and leave it to cool.
Icing:
Cream the butter and a small amount of the sieved icing sugar. Keep adding icing sugar slowly, adding milk in between additions to moisten the mixture. If the mixture is too stiff, add a splash more milk. Add more icing sugar if it is too sloppy. Next add the caramel.I found that after the addition of the caramel the icing becomes quite soft and a bit more icing sugar was needed to stiffen it up again. Beat until fluffy and smooth.
Place a small dollop of the left over caramel onto the top of each cupcake. Next place the icing into a piping bag fitted with a Wilton 1M tip (or equivalent). Starting at the outer edge, squeeze the piping bag and start and inward spiral, overlapping the previous circle ever so slightly. Swirl around and up, moving the nozzle up and down quickly at the top to release the peak from the nozzle. sprinkle over a few caramel pieces (I used jersey caramels) and you are good to go.
Do give these a go, they are not that difficult actually. A few components to think about but the left over jar of caramel sitting in our fridge is well worth the effort!
See you later! :)