
One would assume from my absence on this blog that I haven't been baking lately. You'd think with all this new found free time since finishing uni I would be posting every second day. I wish.
Read MoreSwimming Pools and Cakes
Hello!
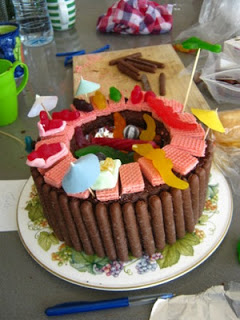
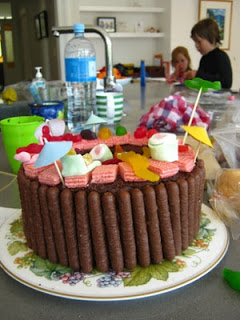
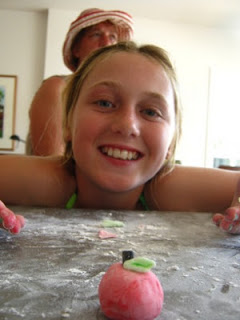
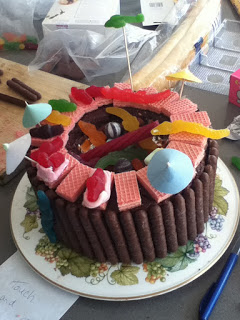
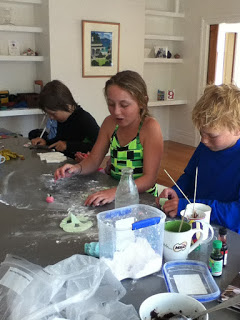
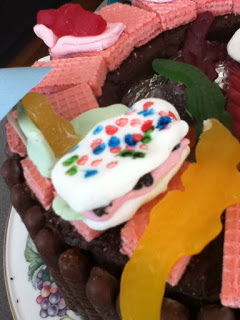
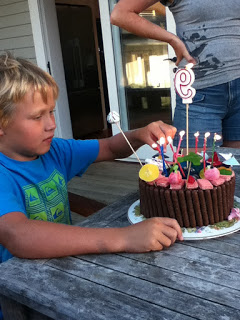
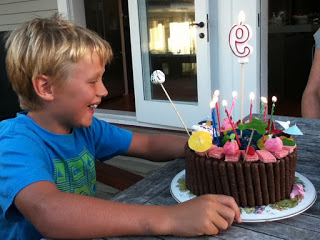
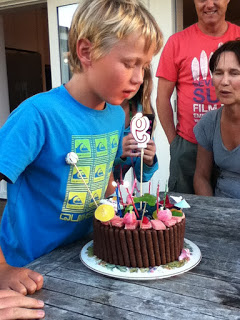
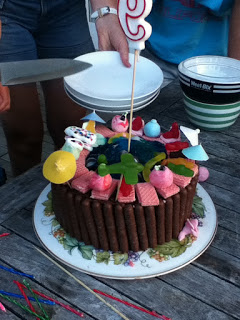
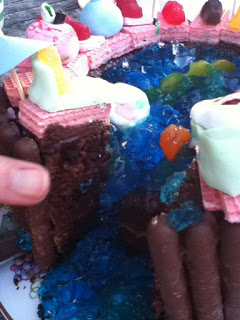
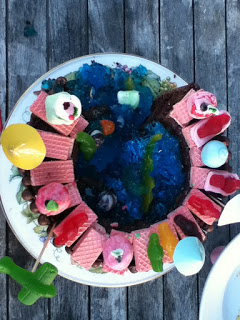
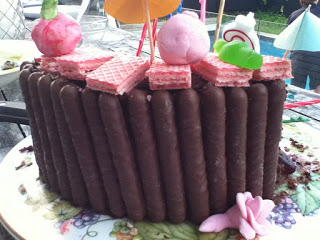
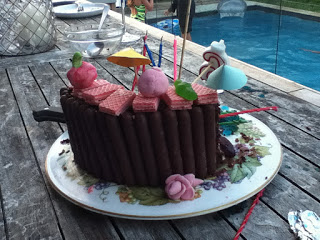
Yesterday, with the help from a team of engineers and builders (as well as a design student) I/(we) created the pool of all swimming pool cakes for Sam, Chris' cousin's 9th birthday. Trying to tell this team that less is more when it comes to decorations is like trying to tell my 9 year old self that you don't need so much glitter. The message just gets ignored. Anyway in the end we presented a Japanese sushi bar, airport swimming pool infested with man eating alligators. Yes. Hmm well it was colourful. Actually no it was hilariously awesome. Definitely tasty. Except for the blueberry jelly, I don't like blueberry jelly.
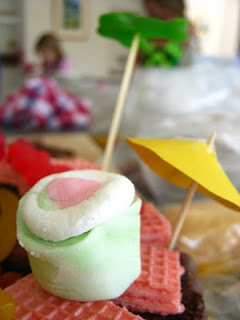
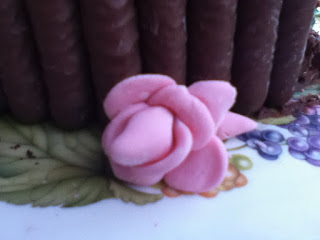
We started with a triple layer chocolate cake with chocolate icing and a doughnut shape cut into the two top layers to make the pool ditch. The whole thing was iced then a bit of tin foil placed in the bottom of the pool to make it jelly proof. Then we met with council pool fencing regulations and make a chocolate finger fence around the pool. Then we got out pink wafer creams and laid the decking down. Chris, out resident design student constructed the umbrellas (the supermarket didn't have the little cocktail umbrellas so we had to improvise). Next came the alligators and the snakes and the chocolate fish and the jelly babies. Then the alligators were made to look like they had a jelly baby in their mouth and from out of no where a jet plane flew over! Note to self, don't let kids loose with fondant because next thing you know giant (proportionally giant) sushi takes a spot on the deck chairs oh wait! and so does the fruit! Haha it was awesome. We ate a lot of sugar in it's construction. Quality control of course.
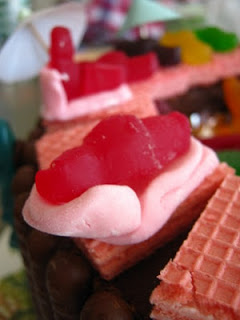 |
| Jelly babies in deck chairs |
 |
| Sushi! |

 |
| Before the Jelly struck |
 |
| The army of builders |
 |
| More sushi! and an alligator |
 |
| And the floodgates opened |
 |
| It was destroyed |
 |
| There was an alligator climbing up somewhere. |
My favourite bit was the chocolate finger fencing. I love chocolate fingers :) Hmm yum. Yes this wasn't a beautiful piece of art, hand painted and sculpted but it was fun and non stressful to make. I hope the pick 'n' mix at your local supermarket gives you some inspiration! :)
I wish I could jump in that pool (the one in the background) now haha.
See you later alligator!
My First Attempt at Swiss Meringue Buttercream
Hi again!
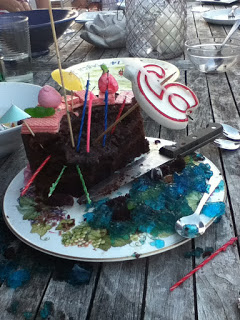
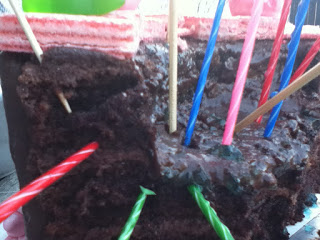
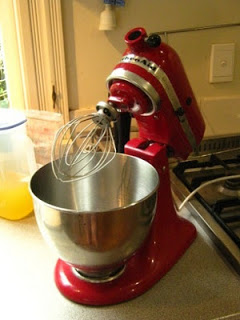
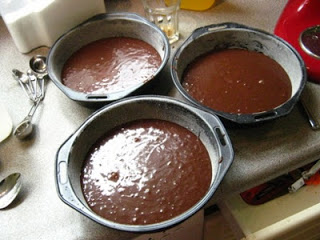
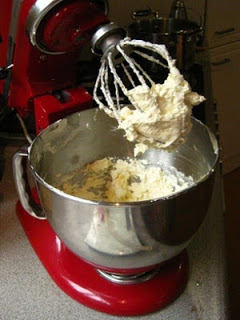
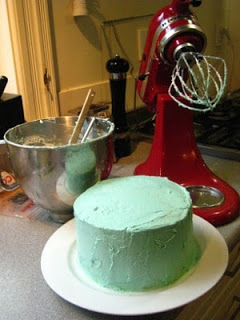
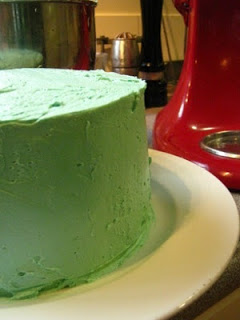
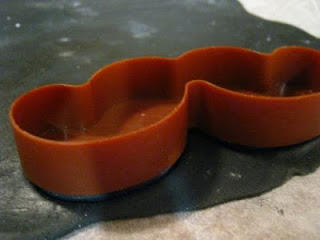
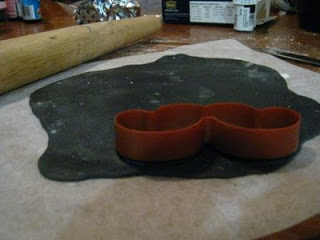
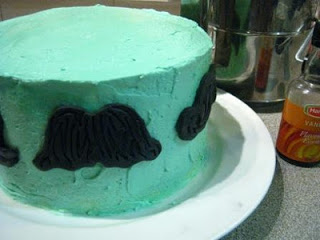
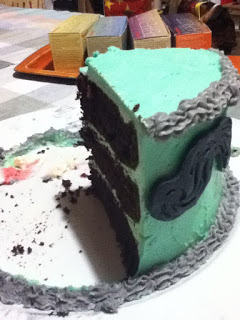
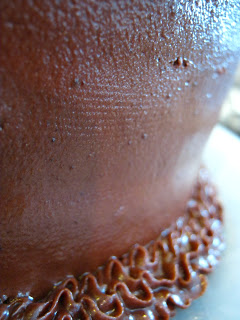
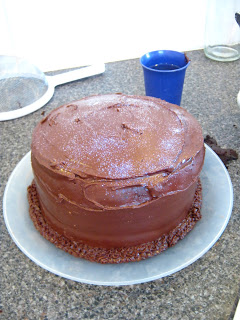
Last Friday was Chris' brother's 14th birthday, so to celebrate I offered to make the cake. We set high hopes for this cake; three layers of chocolate mocha cake and plastered together with a teal green Swiss meringue butter cream and dotted with black fondant mustaches using my munchstache cookie cutters. Well I am pleased to say that my efforts were a success! I used the Whisk-Kid recipe for the buttercream and my mocha chocolate cake recipe so no new exciting recipes today i'm sorry but hopefully this will encourage you to try to decorating techniques like I did. I was so worried this would turn out a total flop and waste a whole heap of ingredients and electricity. Luckily Chris' step mum has a wonderful KitchenAid standing mixer so I was saved a whole heap of beating when it came to making the meringue.

From reading online, Swiss meringue buttercream was apparently a superior icing, with a velvety smooth texture all the while not being sickly sweet. It wasn't very sweet but it was very buttery, I don't know which I prefer. Because it was so hot I had to keep the iced cake in the fridge so that the icing wouldn't melt off or go off in the heat. The cooler fridge temperatures made the icing firm and had a mouth feel like that of butter.On a positive note it is an excellent icing to use in cake construction. It is a great glue and smooths on the sides really easily without picking up on the knife when you go over with more icing.
I recommend using the Whisk Kid instructions (just click the link above), she knows what she is talking about :)
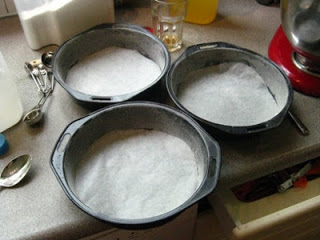
8 inch cake pans were only $7.50 at Farmers the other day and so Chris bought me some in order to make layer caking easier. I am still not so sure how to get a non-doming cake though, some people put strips of toweling around the edge, is that supposed to help?

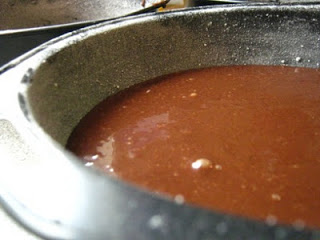
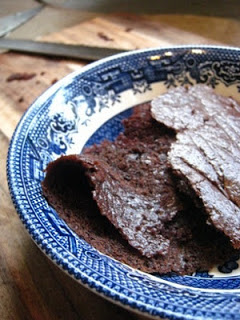
Ahh, the tried and true mocha chocolate cake recipe
Isn't it beautiful?

We had a very watchful observer
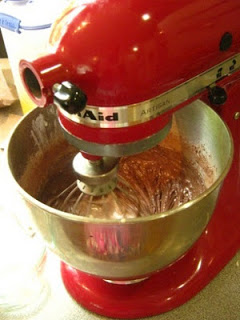
Making the batter took me a grand total of two minutes!!

Ok now for the icing. The basic steps involved in making a Swiss meringue buttercream are:
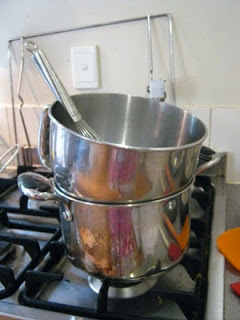
1: dissolving the castor sugar in the egg white using a metal bowl over a pot containing 2cm of simmering water.
2: once the sugar has dissolved, removing the bowl from the heat and beating the egg whites and sugar until very stiff glossy meringue peaks form.
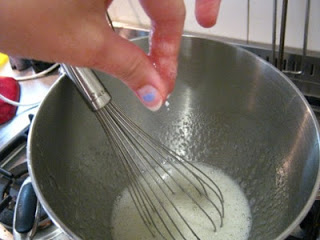
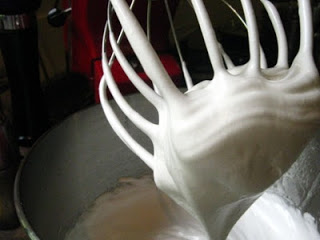
3: slowly adding small cubes of cold butter to the mixture causing the meringue to collapse and forming a sloppy concoction.
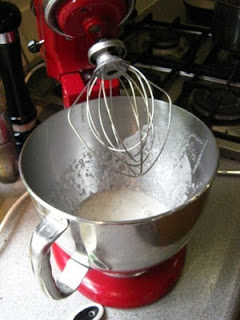
4: beating lots more
5: putting the mixture in the fridge to cool it a bit so it becomes less soupy (which usually happens never fear!)
6: adding flavourings such as vanilla and then continuing the beating until the buttercream becomes smooth and fluffy once again.
I ended up making a 1 2/5 recipe (the 2/5 recipe after I ran out half way through the top coat).
This is what you need to the 1x recipe:
5 large egg whites
200g castor sugar
226g butter cut into small cubes
a splash of vanilla
Basically I recommend you check out the link up the top.
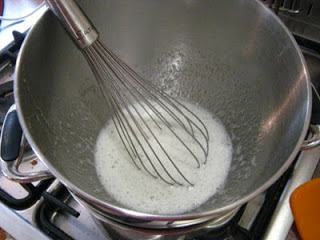
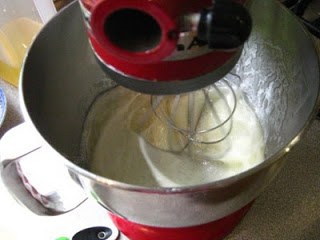


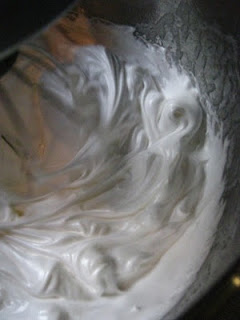
See how thick and glossy it gets? This is good. It also tastes delicious. Pity we have to add the butter.
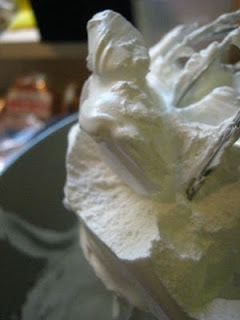

I continued to beat and it became a marshmallowey foam which was quite cool. See the weird texture? At this stage start adding the butter one small cube at a time.
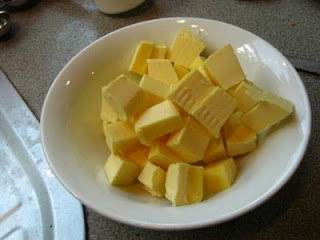
You can see in photos that the meringue totally collapsed and it became all gross and soupy, so what I did was pop both my butter cubes in the freezer and my flopped meringue in the fridge and waited for 20 minutes or so for everything to cool down. The cold butter cubes stopped the butter cream becoming soupy in the future.
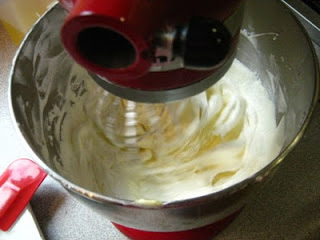


So in the end (trust me) it turned out all good! I coloured it green and flavoured it vanilla. Just keep beating and it will sort itself out.
Now to the frustrating part: Construction and icing.


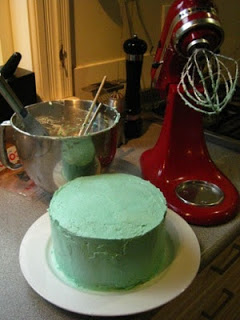
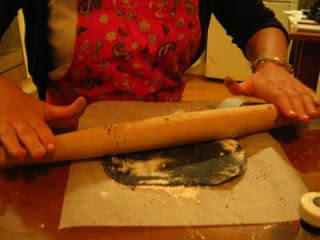
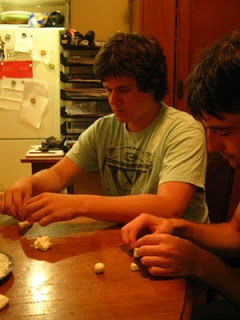
I decided to experiment with fondant for the first time. It was rather tricky (and sticky!) but a few more attempts (and internet stalking!) and I think I might get the hang of it. I coloured it with the Wilton black food gel which went all over my hands. By the time I got to do this part it was about 9pm (I started the cake at 2.30pm), which is why the photos got a bit funny (Chris doesn't think about changing the settings so everything looks yellow).


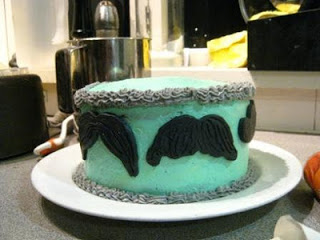

So yes. Here is the final product. By golly it took a while. It tasted rather nice as well when we had it the next day. James was pretty stoked too and it all went down a treat. So for my first attempt at a Swiss meringue butter cream covered cake I don't think I did too badly. But this was just the first, improvement is just around the corner!
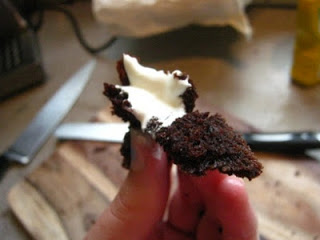
It was so dark and moist! haha moist moist moist!
Bye for now,
Ciao!
A Good Day to Bake Chocolate Cake and Vanilla Cupcakes
Good evening once again.
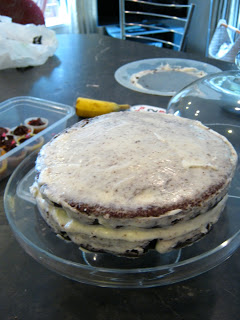
Today my friend Ashleigh (http://kiwigirlskiwiblog.wordpress.com/) and I had a baking date. We decided to make a layered chocolate ruffle cake. There was our first mistake: layered. The cake mixture we used (thinking we would need a lot of it) was massive! Like huge! Turns out the three layers we wanted turned into five . . .
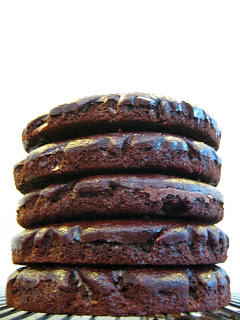
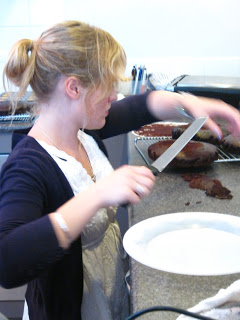
So for fear of a toppling cake that would fit no cake box alive we decided to split it into two and three stacked cakes.Leveling the tops of the cakes was such a pain, I think I will invest in one of those Wilton cake levelers.
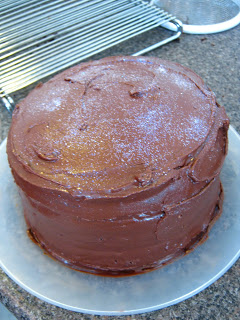
So the three stacked cake was supposed to be this ruffle cake, buuuuuuttt . . . we ran out of icing sugar (as we had already used 1.5kg worth already) and so the icing was a bit too runny (second mistake!) and the ruffles looked like the hillsides of Nelson (sliding down the hill). So that failed. So instead we just iced it. Plain and boring. We had gotten to the point of CBFed and we ended up with this:
By the time we got around to icing the cupcakes we had given up (or at least I had - Ashleigh made pretty, tidy swirls) so I just made big star blobs then covered them with random sprinkles. They taste delicious though. We used the Hummingbird Bakery vanilla cupcake recipe.


Today my friend Ashleigh (http://kiwigirlskiwiblog.wordpress.com/) and I had a baking date. We decided to make a layered chocolate ruffle cake. There was our first mistake: layered. The cake mixture we used (thinking we would need a lot of it) was massive! Like huge! Turns out the three layers we wanted turned into five . . .
So for fear of a toppling cake that would fit no cake box alive we decided to split it into two and three stacked cakes.Leveling the tops of the cakes was such a pain, I think I will invest in one of those Wilton cake levelers.
So the three stacked cake was supposed to be this ruffle cake, buuuuuuttt . . . we ran out of icing sugar (as we had already used 1.5kg worth already) and so the icing was a bit too runny (second mistake!) and the ruffles looked like the hillsides of Nelson (sliding down the hill). So that failed. So instead we just iced it. Plain and boring. We had gotten to the point of CBFed and we ended up with this:
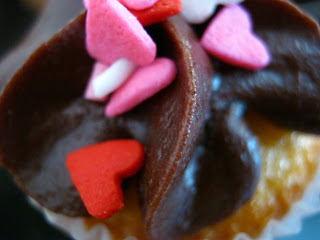
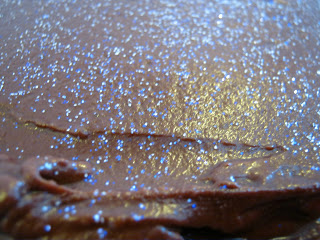
Isn't is monstrous? And that is only three layers. I added some glitter on top to make it a wee bit fancy.
Then we wanted to cover up the bottom edge's messiness . . .
Then we wanted to cover up the bottom edge's messiness . . .
So we added a wee bit of ruffle using my mini star nozzle that had icing in it left over from the cupcakes we also made (they shall come in a sec).
Ta daa!! Doesn't that look tidier now.
Ok so what about the other two layers?
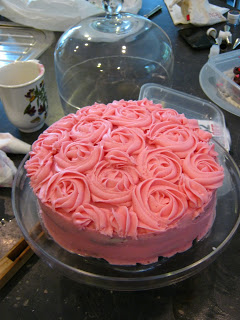
This terrible looking melted, crumby mess went from this:
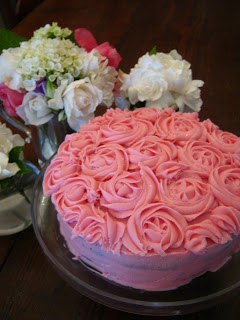
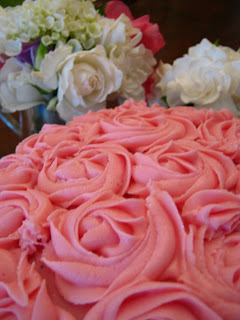
To this! WIN!
Success I think yes! WINNING!!!! All I did was start by making one rose in the middle of the cake and then just piping adjacent roses until I came to the edge (a rose is piped using a 1M Wilton nozzle and starting in the middle swirling outwards). You can see in some places there are wee incomplete roses. In the gaps in between roses I just piped a curve of icing to cover the base but to also blend in with the surrounding roses. You can also see I did it along the edges too. This was a chocolate cake with a cream cheese icing (odd mix I know). Even though I crumb coated and froze the blasted cakes I still managed to get crumbs in it, also I don't think my base layer was thick enough as you can see the cake through the icing. Sort of like trying to cover a black wall with light pink paint; you need a lot of layers.
Sorry, I am quite into taking photos at the moment. I have a really average point and shoot which is extra basic (hence the cheap price I bought it for). I originally got it so that if I went out to town and dropped it no one would cry over it. Only problem is that I haven't used it in town because I don't go anymore. I am a nana.
The cake recipe we used was really big (it used 3 cups of sugar!) so here is another recipe which tastes exactly the same but has smaller proportions and makes quite a decent cake as it is. The final batter is really runny but never fear, just make sure the bottom piece of baking paper you use to line the base of your spring form tin goes up the sides about three cm or so).
Mocha Chocolate Cake ( a recipe from Sue!)
Add the ingredients in the order stated below, beating well between each addition.
2 large eggs
1 3/4 cups castor sugar
1/2 cup sunflower oil
1 cup buttermilk (or half and half yoghurt and milk)
1 teaspoon vanilla
then sift in together:
2 cups flour
1/2 cup cocoa
2 teaspoons baking soda
1 teaspoon baking powder
Once that is all beaten and smooth add:
1 cup of STRONG black coffee
Pour into a well lined spring form tin and bake at 180 degrees (Celsius!!) for 1 to 1 hour 10 minutes or until a skewer just comes out clean.
Once cool, ice with whatever you want, we usually ice this with a chocolate ganache! :) Ill pop that recipe up another day, Oh the suspense!!
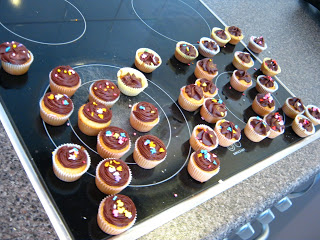
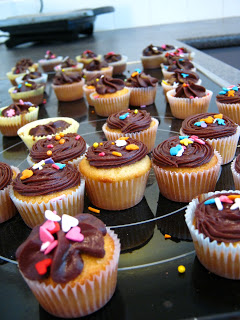
So those cupcakes eh? we ended up making mini ones. Except we didn't expect to make 32 mini ones . .
By the time we got around to icing the cupcakes we had given up (or at least I had - Ashleigh made pretty, tidy swirls) so I just made big star blobs then covered them with random sprinkles. They taste delicious though. We used the Hummingbird Bakery vanilla cupcake recipe.
Vanilla Cupcakes:
40g Butter (softened)
140g castor sugar
120g flour
1 1/2 teaspoons baking powder
1 egg
90ml milk
1 teaspoon vanilla essence
In a bowl, beat the butter, sugar, flour and baking powder until a sandy, but even consistency is reached. Beat the egg into the mixture and beat until smooth. Then add half the milk, beat until combined and then add the rest and repeat. Then add the vanilla (adding extra for good luck :) ) and beat for a few minutes to really make sure the batter is smooth. Oh yeah don;t forget to sieve the dry ingredients first. Spoon into paper cases to 2/3 full and bake at 180 degrees (Celsius!!) for 20-ish minutes or until golden brown and spring back upon touch. Leave to cool and then ice with a plain vanilla, chocolate or other icing of your choice :) This should make about 12 (depending on how big your cases are).
Cool bananas!
Time for a sleep I think.
Happy baking!