Pancake Party!

Hello!


So my lovely flatmate Alix is away this weekend so I am all by myself for a few days. This afternoon I had epic pancake cravings but I couldn't be bothered leaving the freezingness of our flat to go into the freezingness of outside to go to New World to get maple syrup. I finally worked up the enthusiasm, donned a puffer jacket and went. 


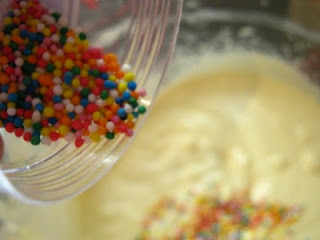
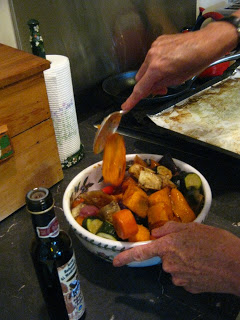
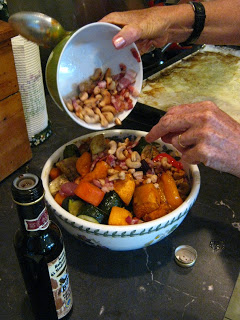
In the meantime a few friends commented on my "Pancake party! pancake party! . . . all by myself" status on facebook and promptly invited themselves over. Luckily! Because pancake parties are always better with people. What's better is that they brought all sorts of exciting toppings with them.


So it turns out the recipe for pancakes that we have at home that our Auntie Rachel gave us is basically identical to Whisk Kid's except mine is without the almond essence. My brother is surprisingly the pancake master in our house. Probably because he has so much practice at making them. He has the whole batch to himself. And no he is not obese. He loves to walk around the house with no top on so he can show off his abs to everyone (mainly himself in the mirror :P) and no they are not skinny boy abs. Actual abs. Dick eh. 


A few pancake making tips: Don't have the pan too hot as you will burn the outside but the inside will still be gooey. However do make sure your pan is fully heated up before you pop the first one in; a hot pan helps prevent the pancake from sticking and making a mess. 


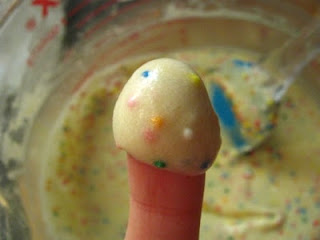
I haven't included many finished pancake shots. Mainly because they didn't survive out of the pan long and also my flipping ability is less than desirable (ie it SUCKS) and so most of them looked a wee bit munted. Also if you are using butter to grease the pan up (which I highly reccommend - it turns the pancakes a lovely golden colour) make sure you wipe it up between each lot so that it doesn't burn.
Also, pancakes are a totally acceptable dinner option. Just saying. Don't judge me. 


Rachel's Yankee Pancakes
(makes 15ish - depending on how small they are)
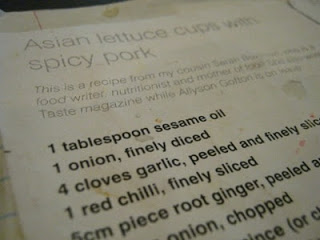
1 1/2 cups plain flour
3 1/2 teaspoons baking powder
1/2 teaspoon salt
5 tablespoons sugar (ok so its supposed to be only 3 but one can never have too much sugar . . .)
1 egg
1 teaspoon vanilla
1 1/4 cups milk
3 tablespoons of melted butter (which is really just a big knob of it, lets say 20-30g)


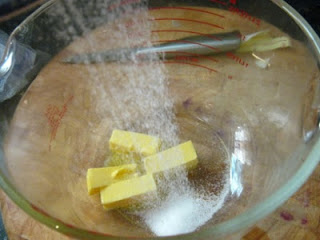
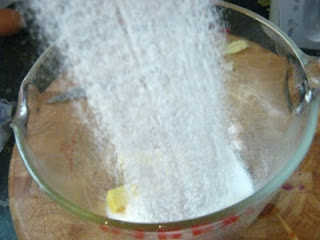
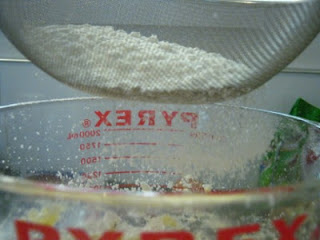
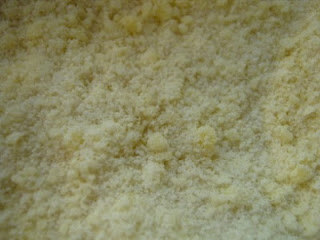
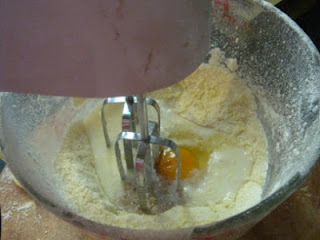
Sieve the dry ingredients together in a medium sized mixing bowl. Make a well in the centre.


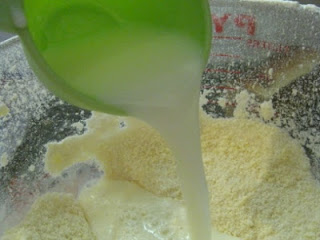
Melt the butter in the microwave. Add the milk to the butter then pop back in the microwave for another 40 seconds to warm the milk up, so that the butter doesn't solidify again (thanks Whisk Kid! never would have thought of that myself). Add the vanilla, then beat in the egg. Make sure the milk isn't hot, just tepid. Don't want to scramble the egg!


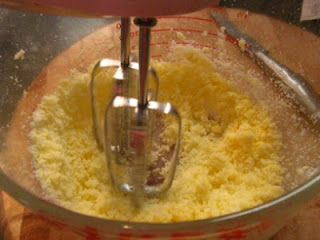
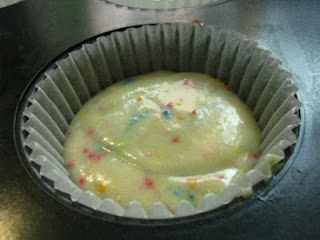
Pour this mixture into the well. Beat together until smooth. Don't overmix this mixture as you will develop the gluten, resulting in dense, chewy pancakes. Bleh!


Sometimes I squeeze some maple syrup into the batter too, just for flavour.
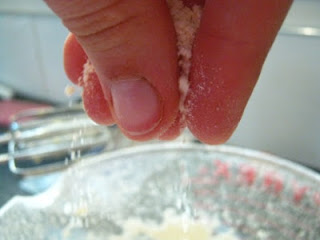
Place a small chunk of butter into your hot pan, swirl it around to coat the base.


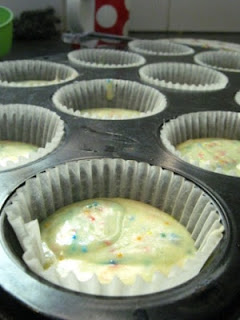
I tend to like small pancakes so I use a 1/4 cup measure to scoop the batter into the pan. Make them as big or as small as you like. It really depends how many people are demanding pancake at once and how much pan space you have. 


Wait until air bubbles form on the surface and you can see the edge of the pancake cooking a little. Also, the pancakes should slide around the pan if they are done on that side. Give them a flip and cook until the other side is golden. 


So FLUFFAAYY!!


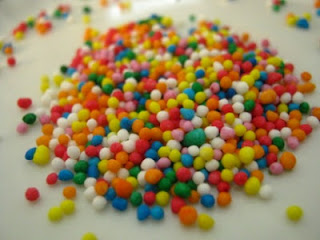
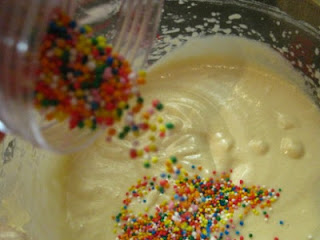
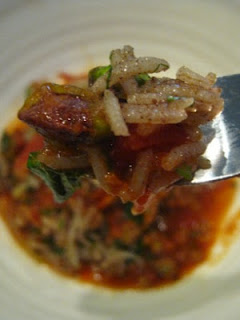
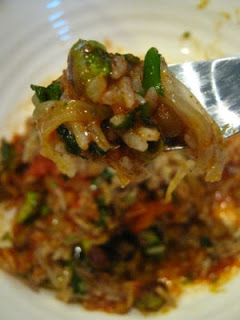
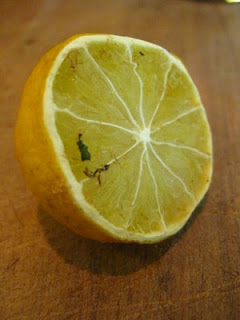
Serve hot with maple syrup/golden syrup/honey/ lemon and sugar/ caramel sauce/ whipped cream/ chocolate sauce/ banana  . . (don't judge us - it was an epic pancake party).


Our table got a wee bit carried away will all the pancake excitement.


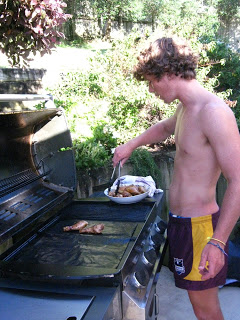
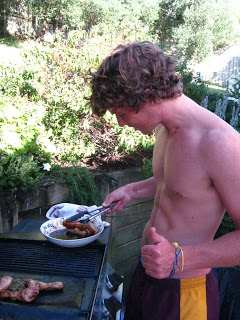
This is my brother making pancakes earlier in the year, he gets about five pancakes out of the whole batch when he makes them this big.


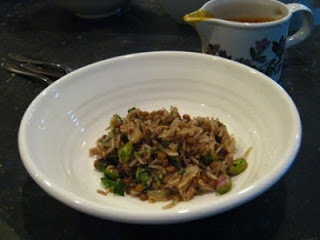
Breakfast for one, how romantic.


I hope you host a pancake party (for more than just yourself :P) soon!


Please excuse the horrific formatting here. Blogger is being a bit special . . don't know why half the writing is highlighted and don't know why the spacing between paragraphs is HUGEEE either. ugh. 


Byee!!


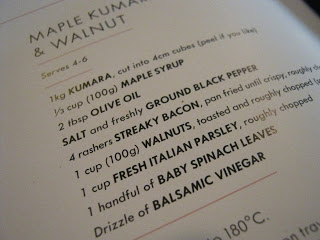
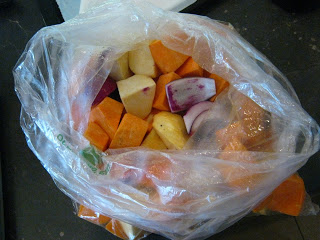
OOh also, I am now blogging my cheap flat cooking recipes for the Otago Daily Times website, so they may or may not appear in full on here. But do check it out if you are in need of some inspiration :)

Slow Cooked Chilli Chicken

Good evening!

This recipe happens to come from my flatmate, Alix's Mum. So full credit of excellence goes to her! It is best served with lots of sour cream and a good sprinkling of fresh coriander. Unfortunately tonight we have no coriander (I think my plant got frozen to death over the holidays) we will just have to make do with extra cheese! (How sad . .)


This dinner was first described to me as 'tinny', as in all you really need is a few tins of this and that and Bam! you have dinner. It takes about 11 mins to assemble and 10 hours on slow in the crockpot or 6 hours on high. I bumped it up to high for the last few hours just to make sure it was done. This can also be made on the stove top, just like you would when making a spag bol or normal chilli. When I made it for my Mum during the holidays on the stove top I used strips of chicken thigh. Chicken thigh is more tender than breast (or leg in tonight's case) and it works well if the cooking time is much shorter. Because we are cooking the chicken for such a long time in the slow cooker it doesn't matter what meat cut you get, since the slow cooking time will melt it straight off the bone. Drumsticks are the cheapest and we only used three (really chunky ones) in this recipe and there was enough to feed 8 (or 6 very (very) hungry males). I froze the left overs to use another night. The original recipe Alix gave me has a packet of Old el Paso taco seasoning in it. I checked the back out and all that is in it is common spices mixed in with a bit of anti-caking agent. So if you want to save money and spend probably an extra 2 minutes of time just use the spices I list below.

Lets do this shall we?

Lets pretend its 9am . .

Slow cooked Chilli Chicken

2 onions, sliced
4-5 cloves garlic, diced
1 tin black beans in chilli sauce
2 tins chopped tomatoes
1 tin whole kernel corn, drained
1 small tin tomato paste
1/2 cup water
1 teaspoon salt
A few tablespoons of sweet chilli sauce
1 heaped teaspoons of each of the following: chilli powder, paprika, ground cumin
A sprinkling of cumin seeds (optional)
A sprinkling of dried oregano
OR
an Old el Paso taco seasoning packet
Enough chicken for each person (so a drumstick/thigh per person and one for the pot, three breasts if serving six)

Pop everything in the slow cooker, give it a stir, pop the lid on, turn on either low or high depending on time available then walk away. 6 hours on high or 10 on low. At about 5pm get two forks and pull the meat off the bone and the chunks of meat apart, it should fall right apart. Pop the lid back on and let it cook for another hour more.


Now all there is left to do is wait! (and cook rice later)

All done!


If you want to do this on the stove top, use breast or thigh as it will need to be mostly cooked before the liquids go in.

For the stove top:

Saute the onions and garlic. Slice the same amount of chicken into nice decent sized strips, brown these up in the pan, don't worry about cooking them through, just aim to get a bit of colour on the meat. Sprinkle in your spices and stir the pan contents around to ensure a nice coating. Let the spices cook for a minute or two to help release some of their flavours. Next add the tomatoes, beans, corn, sweet chilli sauce, salt and water. Bring to a simmer and cook for a further 40mins to an hour.

Serve with rice/corn chips/ in tortilla bread with a good dollop of sour cream, cheese and a sprinkling of fresh coriander.

Enjoy!

Be careful of bones!

Roasted Pumpkin and Garlic Soup

Hello from a frosty Dunedin!

Yesterday (Sunday) was a dreary rainy morning (perfect for studying). It also coincided with the last weekend before exams start. Now dearest Alix is beginning to live at the library (gross) so dinner plans are a bit more fend for yourself than usual. A few weeks ago I bought this massive pumpkin down at the farmers market for $2 and it has been sitting getting hacked away at for various things. So since we (mainly Alix) was in need for nutritious food that wasn't in the form of frozen convenience meals I decided to procrastinate and make pumpkin soup. The funny thing is, is that I don't really like pumpkin soup. Never have. One cup and that will do me for the year. Leek and potato is way better. Anyway, I gave Mum a text and she replied (eventually) with basic instructions for her recipe.


Now this soup is more like add a bit of this and a splash of that. If you like garlic, you add more garlic. If you like curry powder, add more :) In the end I also added a few chopped carrots to bulk and thicken it up a bit.

By roasting your pumpkin first, you get a lovely caramelised flavour developing which just makes it extra tasty (if you like pumpkin soup that is). Also roasting garlic in whole cloves with the pumpkin is awesome. When they come out of the oven you can either peel their skin off or squeeze the gooey garlic pulp out into the soup. You don't get the strong bite of garlic, instead a nice subtle roasted flavour. Mmm mm.


Sophie's Mum's Pumpkin Soup
Makes 13-14 cups

What you will need:

A big stock pot
A food processor, blender or stick blender
A plastic bag

1 large pumpkin
1 bulb of garlic
2 teaspoons curry powder
salt and pepper
10-12 cups chicken stock
40ish grams of butter
2 onions, diced
(2-3 chopped carrots - optional)

Firstly pierce some holes in the top of your pumpkin skin. Place the pumpkin and a small bowl or mug of water in the microwave and microwave on high for about 10 minutes (checking after five or so). This will soften the pumpkin before you chop it, reducing the risk of pre-exam amputation.

Next, chop the pumpkin up into cubes and place in a plastic bag along with a good shake of salt and a good grind of pepper. Splash in some of your best oil, grab the bag around the top and give it a good shake to coat the cubes with oil. Tip the bag contents onto a roasting tray lined with baking paper.

Get your bulb of garlic and split the cloves up and dot them in between the pumpkin pieces.

Bake at 180 degrees for around 40 minutes (more until they are slightly black at the tips and soft in the middle).

Saute your onion and butter in the stock pot until the onion is translucent. Add the curry powder and stir for a minutes to help develop the flavours. Add your pumpkin cubes and squeeze out the garlic into the pot. Stir to coat the pumpkin in the curry powder.

Add your chicken stock and a few thinly chopped carrots (you can roast those too if you want), then leave to simmer for 45ish minutes (I just left mine simmering away while I did some more study.

Once the carrots are cooked through and you think it tastes all right, either use a stick blender, food processor or blender to purée it until the soup is more or less smooth. I personally like my thick soups a little bit chunky.

Pop it back into the pop to heat it up again if you are eating it straight away or leave to cool before transferring into a container. If you are planning on putting it in the fridge or freezer make sure it is completely cool before doing so. Won't take too long in a Dunedin flat kitchen and it prevents you raising the temperature of your fridge (which leads to increased growth rates of pathogens and spoilage organisms such as. . . . sorry micro study haha).


I am a bit of a garlic lover, I added a few more dried garlic
granules to pack some more garlicky punch!


Ok, so my pouring was a little messy . .

Water baths cool them down faster


I have all these left over pottles from work which fit a perfect serving size in them. I managed to get 12 pottles plus one mug of soup for me. I cooled them down in a cold water bath in the sink then froze them. That way when we need a quickie dinner we can just pop one from the freezer into the microwave and bam! 5 minutes to a healthier dinner.


Happy studying! (with soup!)

Funfetti Vanilla Cupcakes

Happy Friday!

TGIF indeed

So last night after taking a break from researching this terrible jelly lab report (yes I am writing a lab report on jelly) I stumbled across some excellent uses of sprinkles! Such as funfetti cakes and cupcakes and just generally sprinkles on top of everything. The best ones I found were on Sweetapolita's blog. Oh my goodness! I love her blog. It's like her life was plucked from a home and garden magazine. Her two girls are the two most adorable cakelets (as she calls them) on the planet! Anyway I am now in love with 100s and 1000s. So after class I ran to the supermarket to stock up.


Throwing in a canister of sprinkles is a great way to make vanilla cupcakes a bit more visually appealing. Lot  of people complain that vanilla is boring, I have to disagree. It is my favourite cupcake flavour. You can ice them with almost any icing type and they still taste delicious!

The recipe II used is just a plain vanilla cupcake mixture from the Hummingbird Bakery Cookbook. It makes lovely fluffy vanillary cupcakes. You just can't beat them. Then I just literally poured in a canister of 100s and 1000s into the batter. Super easy. I decided that keeping the icing plain white against the sprinkles would be best and I think they turned out rather well. I have already devoured three of them since they were iced an hour and a half ago.


Ok so what you will need:

40g softened butter
140g castor sugar (castor sugar gives a better texture than regular sugar as it dissolves more)
120g flour
1 1/2 teaspoons baking powder
1 egg
1/2 cup milk
1 teaspoon vanilla essence (although I am pretty sure I used near to three . . .)
A pinch of salt
A canister of 100s and 1000s


Preheat the oven to 170 degrees

First beat the sugar and butter until it is a nice evenly grained sandy consistency. You want to make sure there are no clumps of butter.

Next, sieve in the flour, baking powder and salt. Beat into the sugar and butter until it is nice and evenly sandy.

Next crack the egg in and splash in the milk. Beat beat beat until the mixture becomes smooth and fluffs up and becomes more voluminous.

Sprinkle time! Pour in about half to three quarters of a canister of 100s and 1000s - depending on how many you want left for the top. Mix those gently in - the colours may start to run so act quickly.

Spoon into 12 cupcake cases (in a muffin tray) and bake for 17-20 minutes or until they are starting to turn that lovely golden colour.

Take them out of the oven, leave to cool.

Make up your icing (lets say 30g butter, 3ish cups icing sugar, a good splash of vanilla, tablespoon of boiling water). Just add more icing sugar or hot water if it is too runny/thick. I don't really follow a recipe for icing. It just happens.

I used a piping bag with a 1M wilton tip on the end (the same for doing roses). I swirled them starting from the outside edge, swirling inwards.

DOUSE them in more sprinkles!

and you are good to go :)

 Sprinkles!
 Sprinkles!
 Sprinkles!
 Sprinkles!

Ok method by pictures:


 Beat your butter and sugar together until it is an even sandy consistency with no butter lumps.


 Sieve in your baking powder and flour
 Beat until a sandy consistency is reached again.
 See how sandy it is?
 Don't forget your pinch of salt.
 Add the milk and egg.
 Beat beat beat until smooth and fluffy :)
 Line your muffin tray.
 See how smooth it is? You can also see air bubbles in the batter.
 Pour in your sprinkles.
 and a few more . . .
 Yay! It looks like a unicorn threw up in my cupcake batter!
 Evenly fill up your cases.
 Pop them in the oven for 17-20 minutes
 and Bam! they come out looking lovely.

 I definately reccommend buying a piping bag and a 1M tip - you can use it for so many icing designs and no matter what, the result will always look good.


 Oh look! there is a rainbow inside! How exciting!
 I may or may not have consumed a few while "writing my report".


So here you have it. The best way to jazz up some vanilla cupcakes. This recipe is nice and cheap to make as you don't need a huge amount of butter, eggs or milk. Excellent! Also makes them kind of healthy . . . until you ice them :)

Time to watch Vampire Diaries now I think :)

Have a good night!

Cheapo Cooking Episode IV: Kushari

Hey everyone!

Tonight boys and girls we are making kushari. Kushari is a popular Egyptian national dish made with lentils and rice topped with a hot spicy tomato sauce and is my new favourite dinner. It is cheap as chips to make, which is why you can often buy it over in road side stalls for next to nothing. The recipe made here is from our wonderful Ripe Deli Cookbook.

Doesn't that look tasty?

Now originally when I thought of lentils, a mushy hippy-commune style of food came to mind. Bleh. Especially when you see them come out of the can. Yes we got the lentils from a can. Why? because we are lazy slaves to the convenience drone. Haha slash who can be bothered soaking their lentils overnight? Anyway keep buying convenience food. Making stuff for you to buy is what my future job will be, so keep buying so I will still have a job.


Mum got that can for $1.83, but you can get cans as low as $1.65. Bargain. The only expensive bits are the nuts and the olive oil. 

So here is how you make it:


Kushari - as told by the Ripe Deli Cookbook

serves 4-6

Lentils and Rice:

1 cup green lentils (we used brown)
50g butter
1 cup basmati rice
2 cups chicken stock (vegetable stock will do for you vegos out there :) )
1 teaspoon sumac (its a red-purpley coloured spice used in middle eastern dishes to add a lemony flavour to meats and other dishes. We didn't have any so we skipped this out. Not the end of the world).
1 teaspoon ground nutmeg
1 1/2 teaspoons ground cinnamon
1 1/2 teaspoons salt
1/2 teaspoon freshly ground black pepper
1/4 cup olive oil
2 onions peeled and thinly sliced
1 cup toasted pistachios
1 cup fresh Italian parsley, roughly chopped
1 cup fresh coriander leaves, roughly chopped

Spicy Tomato Sauce:

1/4 cup olive oil
3 cloves garlic, peeled and crushed
3 red chillis, de-seeded and finely sliced.
400g can crushed tomatoes
1 1/2 cups water
1/4 cup cider vinegar/white wine vinegar
1 teaspoon salt
1 teaspoon ground cumin
1 teaspoon paprika (we use la chinata smoked paprika)
1/4 cup fresh coriander leaves, roughly chopped

I know this seems like a long list of ingredients, but it's really not. Bear with me :)

Now we are assuming your lentils are already cooked (if they are from a can they are cooked and soft).


To prepare the spicy tomato sauce:


In a saucepan over high heat add the oil, garlic and chillis and cook for 3 minutes.

Add the tomatoes, water, vinegar, salt, cumin and paprika. Bring to the boil then lower the heat and leave to simmer for 30 minutes until thickened.

Stir in the fresh coriander leaves. 

Taste to see if more salt, pepper or coriander is needed.


To prepare the rice and lentils:


In a saucepan over a high heat, melt the butter and then add the rice. Cook for 1 minute stirring constantly. 

Add the stock, water, sumac, nutmeg, cinnamon and salt and pepper.

Bring to the boil, then reduce the heat to a low simmer and cook for 12 minutes before removing from the heat.

Cover and set aside for 12 minutes (to let the rice cook).

While the rice is cooking prepare the onions.

In a large frying pan, heat the olive oil to a medium heat and slowly cook the sliced untils until dark gold in colour. This should take approximately 20 minutes.

Break the cooked rice up with a fork.

In a large bowl mix together the lentils (drained), rice, toasted pistachios, fresh parsley and coriander and 2/3 of the cooked onions.

Season with salt and pepper and pile high on a platter. 

Top with the remaining onions.

Once individual portions are served, pour the hot tomato sauce over the top.


 The rice was really tasty even without the tomato sauce. It would be a really tasty summer salad as well.


Every spoonful is different.

Enjoy! we sure did :)

See you later!

Cheapo Cooking Episode III: Asian Lettuce Cups

Good afternoon to you all!

I have just filled up on foamy milkshake and I am ready to go! We cooked this the other night but had I uploaded it then it would have meant four posts in two days. Waaay too OTT so I have stretched it out a bit. The last few days I have been chilling at Chris' house as well as making his cousin a mean as birthday cake, but that is another story entirely. My time has been filled with A LOT of Sims 3. I don't have the Sims at home, I used to but we got rid of the PC and replaced it with Mac. Macs don't like the Sims. Which is a shame. Which is probably a very good thing. Anyway Chris was playing Team Fortress 2 so I had to do something so for hours on end we gamed. My eyes were blood shot by lunch time. Eep! Anyway the moral of the story was that my sim was extremely fertile and kept having children. Then they grew up. Hmm I didn't manage to kill anyone which was a shame. My matriarch did however become an elder. Anyway back to those lettuce cups.

This recipe is basically carb-less so guys look away. But girls is really rather tasty and it's lack of carbs means that you can have dessert too! haha excellent.


You will need for the mince:
500g beef or pork mince
1 Tablespoon sesame oil
1 onion
4 cloves finely diced garlic
1 chilli finely sliced (a teaspoon of chilli powder will do)
1 Tablespoon crushed ginger or 5cm root ginger grated
1 spring onion chopped
1 bunch coriander, both roots and leaves chopped
2 tablespoons sweet chilli sauce
2 tablespoons kecap manis (sweet soy sauce)
1 Tablespoon fish sauce
juice and rind of 1 lime
1 iceberg lettuce separated into their leaves

Sweet chilli sauce to garnish

Garnishes:
1 red capsicum all chopped up
1 carrot julienned
1 spring onion chopped
1/2 cup roasted, salted peanuts chopped


So basically you brown your mince then add all the sauces and onion and garlic and spring onions and coriander and lime. Then this simmer for 20 - 30 minutes.


From left: Fish sauce, kecap manis, sweet chilli, sesame oil.

 This fish sauce was only $1.99!

 Mum got a whole bag of these wee chillis from the Asian supermarket and keeps them in a freezer until when she needs them. Remember the smaller and redder they the hotter so you only need one. Slice them in half and scrape out the seeds. Wear gloves to stop the capsaicin (the chemical which makes them spicy) getting on your hands because it doesn't wash off easily. Then when you scratch your eye . . yeah well hmm. Just wear gloves haha.


Now get your lettuce leaves, wash them and split them so they make nice bowl shapes.


Now to serve, pop everything in bowls on the table. Place the lettuce  on the plate and everything else on the lettuce like you would when making a burrito. Then wrap it :)


And there you have it! They are really rather tasty. The sauce that the mince is in is delicious and lettuce is unfortunately not absorbent enough to soak it up.

 Have a good afternoon!

Cheapo Cooking Episode II: Quick and Tasty Corn and Feta Fritters

Two posts in one night! flip too much culinary activity is going on in my house today (check out my lemon cupcakes I also made today!)!

This evening, Mum couldn't really be bothered cooking and so we made corn fritters using an Annabel Langbein recipe from her book Good Food for Busy Lives. The only expensive ingredient in these is the feta cheese which is totally optional, you can even substitute it for your normal cheese if you wanted. Just grate the edam or whatever and add it to the mix. You can usually buy whole kernal corn in brine for $0.99 if its on special and for a single batch here you only need 1 can. Cheap or what! Tonight we were feeding Chris, Jack (who is just always hungus!), Dad, Mum and myself so we did a double recipe and that worked out just nicely. A single recipe makes around 8 depending on how big you make them.

Ooh! don't they look good?!

Ok Here is what you will need:


1 cup self raising flour (if you don't have self raising you can use standard flour with 2 teaspoons of baking powder added)
2 eggs
1 teaspoon salt
1/2 cup soda water (we use milk when we have no soda water)
1 can of whole kernel corn ( not creamed!!!)
half a packed of feta
fresh herbs such as parsley, sage and thyme
cracked pepper if you wish


 (Lettuce from Mum's garden - I like the colour which is why I took a photo)

 Beat the eggs, soda water flour and salt together.


Add the corn, feta, herbs and pepper and mix well.

 Fire up the stove!

 Slosh a bit of cooking oil into a hot frying pan. Make sure the pan is hot before you add the batter as it helps prevent the fritters from sticking. The same goes for fried eggs and pancakes.

 I use a 1/3 cup as my scoop as it makes good medium sized fritters. Cook them until the edges bubble and look par cooked then flip them over.


 Oh don't they look nice and golden!


 Serve them with a nice salad

 I prefer serving mine with a nice dollop of sour cream and sweet chilli sauce! Yum!


And there you go, quick and tasty corn fritters that are so so cheap to make but nice and healthy (provided the sour cream you dollop is lite! :) )

Nighty night!! Happy cooking!

Cheapo Cooking Episode I: Asian Marinated Chicken Drumsticks with Seasonal Roast Vegetable Salad

Good Evening

Its 5pm and dinner needs a makin'! So tonight Mum and I are making some yummy barbequed chicken drumsticks and a roast vege salad (plus a raw energy salad from the Ripe Deli cookbook but I am not including that one). Btw we are serving four tonight including Dad and one very very hungry Jack.


Cooking cheaply as we have all been told is buying meats that are on special and buying produce that is in season. So what I recommend you do is to Google New Zealand (or whatever country you are in) produce calendars. This one here isn't too bad nor does this one which is the Turners and Growers site which is probably more reliable. Anyway the bottom line is that when a fruit or vegetable is in season is is cheaper and of better quality and containing more vitamins and minerals. Also check out local food markets such as the Otago Farmers Market held at the Railway station for some great deals on fresh produce. Especially apples in the winter! $5 a bucket! nom nom. In season produce also means that the food in your fridge has not had to travel for weeks on end to get to you which uses up all sorts of natural resources etc etc.

So firstly lets focus on the chicken.

I can't even remember where we got this recipe from, I think it is from Mum's friend Hil. Anyway the ingredients in the marinade you can all buy from an Asian food market and are cheaper there than at the supermarket. The initial outlay might be around $20 but once you have them they are so worth it and last a while too. We chose to use chicken drumsticks as they are the cheapest part of the bird you can get. Usually we use chicken thighs but it really doesn't matter. The thighs are just more tender.


But look at that! almost a kilo of chicken drum sticks for $4.78! In that pack we got 10 of them.


So here is the scrawled out recipe. So on top of the chicken pour on:

2 teaspoons sesame oil
2 cloves of crushed garlic
1 teaspoon crushed/chopped/grated ginger
2 Tablespoons kecap manis (sweet soy sauce)
1 Tablespoon oyster sauce
1 Tablespoon fish sauce
1 Tablespoon honey


From left: Crushed ginger (Mum can't be bothered buying fresh ginger at the moment), sesame oil, oyster sauce, garlic cloves, fish sauce, honey.


This is the VITAL ingredient. It is dark, sweet and syrupy and rather delicious. It is nothing like the soy sauce that you pop on top of your sushi. You can now buy it at most supermarkets if you aren't near an Asian supermarket.


Oh no! we ran out of kecap manis!


Never fear! Mum has an even larger bottle stashed in the pantry.


So yeah, pop it all on the chicken


Add a bit more kecap manis for good luck!


Bam! marinade complete! Now pop this in the fridge whilst you prepare the vegetables or pop them straight on the barbie. If you are super on to it you could make this in the morning and let it absorb the delicious sauce over the course of the day so are all ready for you to cook when you get home from your four hour micro lab at 6pm! Now if you don't have a barbecue I suggest you become friends with the neighbours that do! :) A quick food safety tip!: before you cook them on the hot plate I suggest you pop them in the microwave and nuke them for a few minutes. Also microwave the left over marinade left in the bowl for 2 minutes and then pour over the chicken drums to make them extra saucy!


We have this nifty non stick Teflon sheet that you  put on top of your hot plate so that you don't have to clean the barbie and you don't have to use oil.


Jack pretending to cook


You see how there is quite a bit of marinade left over, this is amazing poured back over the chicken (once cooked in the microwave of course!)


Slice open the fattest piece of chicken and check that the inside meat is not pink (unlike the photo above) and the juices run clear. I dunno about you but I quite like a bit of charring on my chicken, it gives it that nice barbecued taste. It's just the fatty skin charring that you weren't going to eat anyway!


Ok now for the vegetables. This salad is inspired by the wonderful Ripe Deli cookbook.


Now we don't actually follow the recipe here but we do use the bacon, cashews and maple syrup. You can leave out the nuts and bacon if you are feeling a bit poor they are not vital. 

Ok what you will need for an amount shown below:

2 orange kumara
2 red kumara
2 red onions
3 corgettes
2 capsicum
3 carrots
1 aubergine (aka eggplant)
splash of olive oil (1/4 cup is more than enough)
a drizzle of maple syrup (no more than 1/4 cup)
handful of cashew nuts (optional) toasted in an oil less pan
a few rashers of streaky bacon (optional)
a few handfuls of baby spinach leaves (again optional if its on special)
one plastic bag
salt and cracked pepper

Ok so peel and chop your kumara and onions, pop into the plastic bag, pour in the half the oil and then shake the vegetables around to cover them in oil. Pour onto a baking tray, drizzle with maple syrup and then bake at 180 degrees for half an hour or until the vegetables are almost cooked through. drizzle a bit more of the maple syrup on top. Then toss the chopped corgettes, capsicum, carrots and aubergine in the other half of the oil and squeeze these on the tray to finish off for another half an hour. Mum just cooked them in two separate lots because there wasn't room on the tray. Once the vegetables are all cooked pop into a serving bowl, toss through the bacon, cashews and spinach if you wish and then drizzle with some balsamic vinegar. Yum yum!


This is an easy way of evenly coating a lot of vegetables with only a small amount of oil


The first lot of vege cooking


Second lot of vegetables; capsicum, aubergine, corgette and carrot


Toasting the cashews so they are nice and crunchy


Tossing the first lot

Drizzle some more


Now for the rest of the vege


Transfer into a serving bowl


Drizzle over some balsalmic


Sprinkle over some sea salt


Toss


Sprinkle over the bacon and cashews


And voila! Done!
Add caption


And that my friends is the Edmonds Family's dinner for tonight (along with a rather groovy looking beetroot salad).

We had a lot of left overs in the salad department so if you are cooking for less or for a group of girls you may decide to use less vegetables. Remember this is cooking and not baking so it doesn't matter if you alter the recipe slightly to suit your taste. The oil amounts are just guidelines, you could use other oils such as rice bran. Up to you or what you have available. For the salad you can add in parsnips and pumpkin later in the year.

See you soon!