
So turns out I wrote about butter chicken last year. Well forget that recipe. This is by far the superior option.
Read MoreJam and Custard Cupcakes
Happy Saturday!
I have been trying to write this post for a few hours now. I have had a micro episode of writers block. It is kind of a gloomy day and I have no one to surprise give these so I guess I am lacking the excited surge I usually have to share recipes with you.
Actually scratch all of that. I just munched into another cupcake, I can feel their deliciousness moving into my finger tips, preparing for a full on keyboard onslaught. YOU NEED THIS RECIPE! LIKE NOW!
A few weeks back when I first spied this recipe in my Mum's new Ripe Recipes (A fresh batch) I knew that it be high up on the list of things to make.
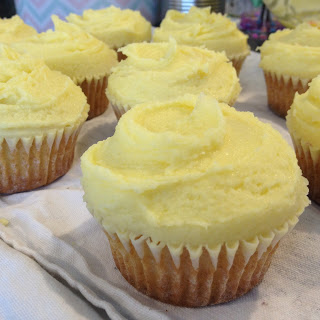
These are actually divine. You take one bit and your soul is filled with joy.
What I think I like about this recipe is the custard powder. Yes custard purists out there (myself included) believe that the only custard consumed should be the custard made from eggs. However custard powder has a fond place in my food memory bank. Obviously childhood custard consumption but more recently I have come to associate it with late night custard feasts with my flatmate Alix last year. We went through about six litres of milk each week just to fuel this custard craze. It was always consumed after 12am as well when neither of us could get to sleep or we just couldn't be bothered getting into bed. Good chats were had over the kitchen table and a huge jug of the vanillary yellow goodness.
So these cupcakes remind me of Alix. She is great. I miss her haha.
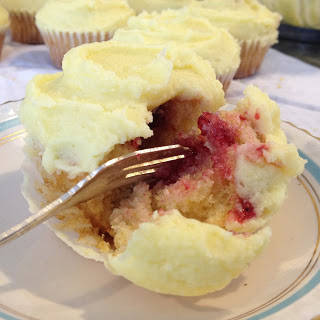
The jam filling also reminds me a lot of the eccles cakes Nana used to make. So really these are just little cakes of nostalgia. Which is what I like in a cake. Cakes need to be filled with feeling.
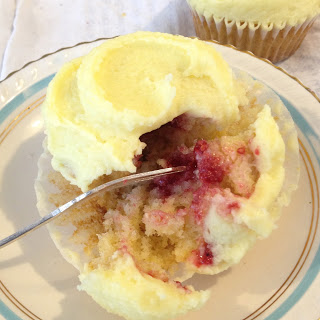
The funny thing about these is that the starch provided by the cornflour in the custard powder gives a funny (not good nor bad, just interesting) texture to the icing. It is the starchy texture that you actually find when you make the custard up in the microwave which in a way is kind of cool. The custard powder also gives the cupcakes themselves a nice crunchy outer layer.

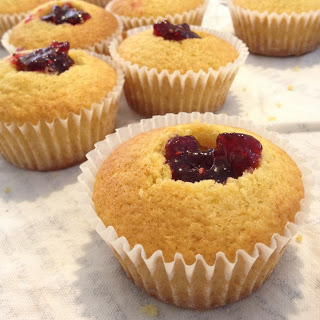
I only had raspberry jam in my fridge but strawberry would also be a dream. Obviously the better the quality of your jam the better these will be. I quite like the Anathoth jams as they are quite runny, not so good for your toast but perfect for filling cupcakes with.

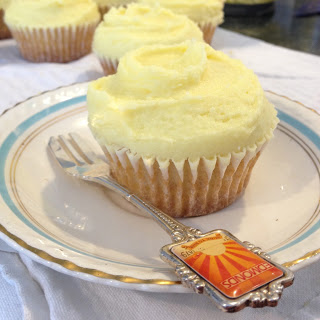
Jam and Custard Cupcakes
(from Ripe Recipes - A fresh batch by Angela Redfern)
Makes 10
50g butter, softened
1 cup plain flour
2/3 cup caster sugar
2 teaspoons baking powder
1 tablespoon custard powder
1 large egg
1/2 cup milk
1 teaspoon vanilla
10 small teaspoonfuls of jam
icing:
2-3 cups icing sugar
50g butter, softened
3 tablespoons custard powder
couple of splashes of milk
1 teaspoon vanilla
Preheat the oven to 180 degrees and line a muffin tray with 10-12 cupcake cases.
In a large bowl or free standing mixer, beat together the dry ingredients and the butter until a fine crumb ed texture is achieved. This could also be done in the food processor then transferred back to a mixing bowl.
Beat in the egg and slowly pour in the milk and vanilla whilst still mixing. Beat until a smooth batter is formed.
Scoop using an ice cream scoop, the batter into each cupcake case until it is two thirds full.
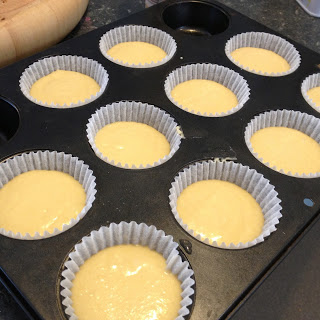
Bake for 20 minutes.
Once cool, use a sharp knife to cut cone-shaped holes out of the top of the cupcake.
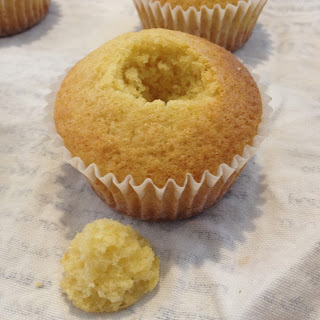
Spoon in a teaspoon of jam into each hole.
To make the icing, cream together the icing sugar, custard powder, vanilla and butter, using the milk to loosen the mixture until a light and fluffy icing is achieved.

Swirl the icing onto the cupcakes using a butter knife or a small palate knife.
Share with some good friends :)
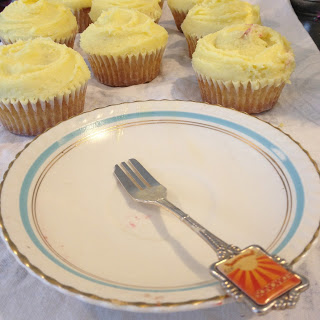
Enjoy!
I have been trying to write this post for a few hours now. I have had a micro episode of writers block. It is kind of a gloomy day and I have no one to surprise give these so I guess I am lacking the excited surge I usually have to share recipes with you.
Actually scratch all of that. I just munched into another cupcake, I can feel their deliciousness moving into my finger tips, preparing for a full on keyboard onslaught. YOU NEED THIS RECIPE! LIKE NOW!
A few weeks back when I first spied this recipe in my Mum's new Ripe Recipes (A fresh batch) I knew that it be high up on the list of things to make.
These are actually divine. You take one bit and your soul is filled with joy.
What I think I like about this recipe is the custard powder. Yes custard purists out there (myself included) believe that the only custard consumed should be the custard made from eggs. However custard powder has a fond place in my food memory bank. Obviously childhood custard consumption but more recently I have come to associate it with late night custard feasts with my flatmate Alix last year. We went through about six litres of milk each week just to fuel this custard craze. It was always consumed after 12am as well when neither of us could get to sleep or we just couldn't be bothered getting into bed. Good chats were had over the kitchen table and a huge jug of the vanillary yellow goodness.
So these cupcakes remind me of Alix. She is great. I miss her haha.
The jam filling also reminds me a lot of the eccles cakes Nana used to make. So really these are just little cakes of nostalgia. Which is what I like in a cake. Cakes need to be filled with feeling.
The funny thing about these is that the starch provided by the cornflour in the custard powder gives a funny (not good nor bad, just interesting) texture to the icing. It is the starchy texture that you actually find when you make the custard up in the microwave which in a way is kind of cool. The custard powder also gives the cupcakes themselves a nice crunchy outer layer.
I only had raspberry jam in my fridge but strawberry would also be a dream. Obviously the better the quality of your jam the better these will be. I quite like the Anathoth jams as they are quite runny, not so good for your toast but perfect for filling cupcakes with.
Jam and Custard Cupcakes
(from Ripe Recipes - A fresh batch by Angela Redfern)
Makes 10
50g butter, softened
1 cup plain flour
2/3 cup caster sugar
2 teaspoons baking powder
1 tablespoon custard powder
1 large egg
1/2 cup milk
1 teaspoon vanilla
10 small teaspoonfuls of jam
icing:
2-3 cups icing sugar
50g butter, softened
3 tablespoons custard powder
couple of splashes of milk
1 teaspoon vanilla
Preheat the oven to 180 degrees and line a muffin tray with 10-12 cupcake cases.
In a large bowl or free standing mixer, beat together the dry ingredients and the butter until a fine crumb ed texture is achieved. This could also be done in the food processor then transferred back to a mixing bowl.
Beat in the egg and slowly pour in the milk and vanilla whilst still mixing. Beat until a smooth batter is formed.
Scoop using an ice cream scoop, the batter into each cupcake case until it is two thirds full.
Bake for 20 minutes.
Once cool, use a sharp knife to cut cone-shaped holes out of the top of the cupcake.
Spoon in a teaspoon of jam into each hole.
To make the icing, cream together the icing sugar, custard powder, vanilla and butter, using the milk to loosen the mixture until a light and fluffy icing is achieved.
Swirl the icing onto the cupcakes using a butter knife or a small palate knife.
Share with some good friends :)
Enjoy!
Orange and Lemon Polenta Poppy Seed Cake
I am supposed to be sleeping, getting ready for a long flight to Hawaii in the morning.

But no, I cannot leave on holiday without first getting my affairs in order (ie posting for both of my blogs).
I made this cake last week with my excellent cousin Georgia. We were lacking in a car to drive places and we both kinda felt like cake.
For Mum's birthday Jack and I bought her the new Ripe Deli book
Ripe Recipes: A fresh batch.
Boy is it a great book! I have photocopied what seems to be every second page.
Amongst the wonderful recipes in this book was a recipe for gluten free orange and lemon polenta loaves.
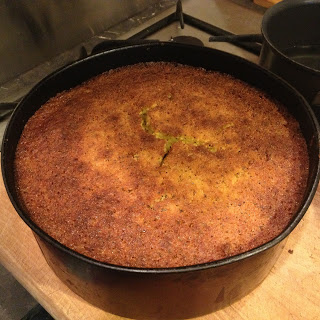
They looked so moist and excellent in the picture. We had polenta, and ground almonds and plenty of oranges and lemons! The only thing we didn't have were the two loaf tins required. So we decided to turn this into a cake. And a large cake at that.
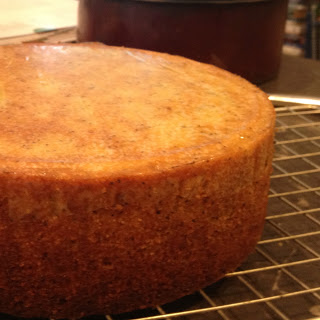
We used a 23cm round tin with decently high sides. The cake rose right to the very top! It was seriously the tallest single layer cake I had ever seen. It was really impressive looking. The high fat content also ensured the cake's easy removal from the tin. Overall making this cake was almost as much of a dream as that heart shaped feijoa cake a few weeks back.
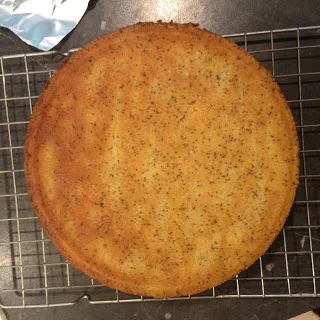
This recipe was supposed to have chia seeds in it. We used poppy seeds instead. Sure they don't have all the super nutrients that chia seeds supposedly have but they give the same speckled effect.

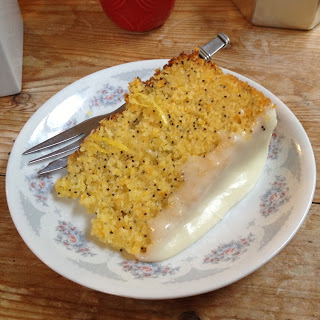
Polenta comes from very finely ground corn, hence why this cake is gluten free (provided you use maize corn flour and gf baking power). The polenta lends quite a corny taste to this cake as well as a soft gritty texture. It is interesting and strangely addictive. The moistness of this cake is to die for. Make sure you put plenty of zest lemon icing on the top as well! We were too impatient to munch on cake while watching a movie so the warm cake caused the icing to dribble everywhere but really at the end of the day who cares?

We found the method of this cake really really weird. You have to boil the oranges and lemon for ten minutes then whizz them up in the blender to a pulp. Then this all gets added to the cake. Adding to the moistness I suppose.
Are you uncomfortable with the number of times I have said moist in this post so far?
Tehe.
Orange and Lemon Polenta Cake with Poppy Seeds
Makes one very tall 23cm cake
2 oranges, topped and tailed so that they can stand without rolling around in the saucepan.
1 lemon, topped and tailed
1 1/4 (210g) cup finely ground polenta
1/4 cup (35g) cornflour
1 cup (100g) ground almonds
2 teaspoons baking powder
3 tablespoons poppy (or chia) seeds
250g butter, softened
2 cups (440g) castor sugar
1 teaspoon vanilla
6 large eggs
Preheat the oven to 160 degrees on bake.
In a medium sized saucepan, place the oranges and lemon and then pour in boiling water until it reaches two thirds of the way up the fruit. Boil for five minutes, flip over the fruit then boil for another five. Remove from the water and set aside to cool a little.
Cream together the butter, sugar and vanilla. Add the eggs one at a time until the incorporated and fluffy.
In a separate bowl, mix together the polenta, almonds, corn flour, baking powder and poppy seeds.
In a blender or small food processor, blend the oranges and lemon to a smooth pulp.
Add a cup of the dry polenta mix and a few dollops of the pureed fruit mix to the butter-sugar-egg mix and mix until incorporated. Continue adding the polenta and puree alternately until it has all been mixed in.
Pour the mixture into a large, tall, lined and greased cake tin.
Bake for an hour then cover the tin with tin foil and bake for a further 30-40 minutes or until a skewer comes out clean.
Leave to cool before removing from the tin.


Once fully cool ice with a lemon glaze:
25g melted butter
2 cups icing sugar
juice of 1 lemon


Enjoy!
Ripe's Rocky Richmond Road Slice
Summer is the season for slices.
Slices are the perfect picnic treat. They can be packed up in plastic containers and safely make their journey to a favourite picnic spot. In my family that picnic spot is anywhere that has sand (much to the annoyance of Dad) and an ocean.

Slices are durable and sharable. They don't need fancy plates, forks or accompaniments, just fingers and a mouth.
We often make up slices and pop most of them in the freezer so that the next time we head off for a day at the beach we can put out a slab, chop a bit off and go.
In the case of this slice, half went into the freezer and the other half I took on up to Nana's for morning tea :).
The one problem with Summer is the heat. Most slices have butter in them which means as the temperature rises they start to become soft and sometimes even melted. Unfortunately with this slice, it needs to be transported in the presence of a couple of ice packs. Then again, how many of us go to the beach without ice packs in our chilly bags/bins anyway.
This recipe comes from the Ripe Recipes book by Angela Redfern. It contains all the recipes for the delicious treats that can be found at the Ripe Deli on Richmond Road (hence why this is called Richmond rocky road slice) in Auckland. Out of all Mum's recipe books, this is the one that she has used the most and made the most things out of. Every week or so there is a new surprise coming out of the kitchen which had its origins in this book.
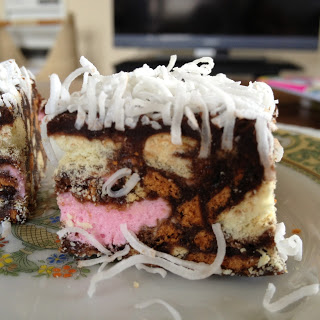
This isn't your typical rocky road, it is more of a fridge set biscuit slice. Actually, it is a biscuit fridge set slice. The only point of difference is the presence of malt biscuits and marshmallows. It doesn't involve actual chocolate either, just cocoa, butter and sugar which makes it a cheaper option that the traditional chocolate laden rocky roads out there.
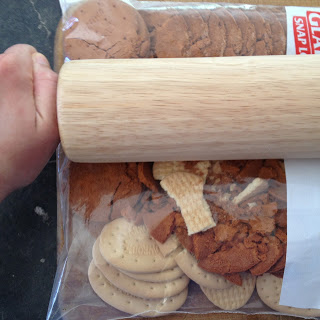
This is great if you have some built up tension that needs to be worked out as you get to bash the crap out of a poor little bag of biscuits with a rolling pin. Make sure the bag is double lined or else it might split, resulting in more stress and a whole lotta mess!
Rocky Richmond Road Slice
Adapted form the Ripe Recipe's cookbook by Angela Redfern
250g malt biscuits, crushed
250g super wine or arrowroot biscuits, crushed
250g marshmallows, roughly chopped
200g butter
1 cup caster sugar
3 tablespoons cocoa
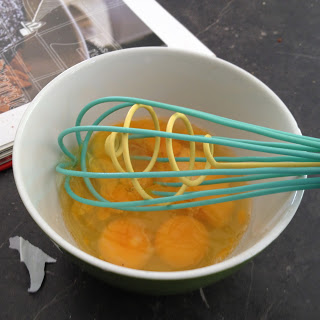
3 large eggs, lightly beaten
icing:
1 1/2 cups icing sugar, sifted
2 tablespoons cocoa, sifted
50g butter, meted
2 tablespoons lemon juice
1/2 cup threaded coconut
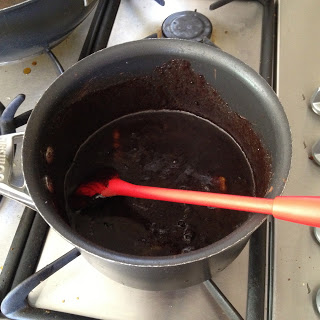
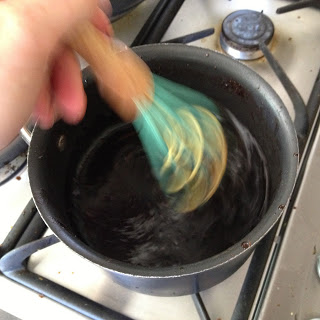
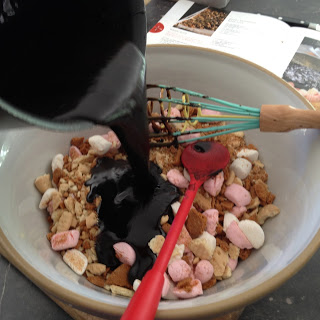
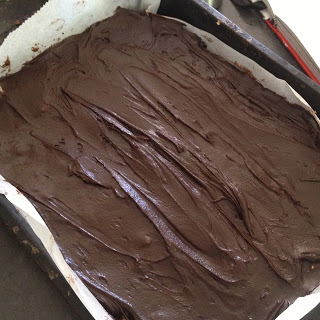
In a saucepan, melt together the butter, caster sugar and cocoa until smooth. Add the lightly beaten eggs whilst stirring briskly and cook for 5 minutes, stirring constantly. Turn off the heat and leave to cool for 10 minutes.
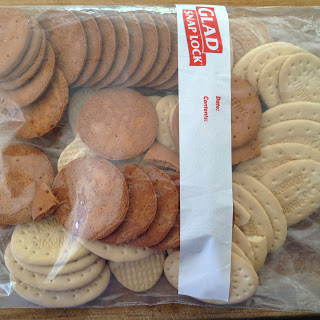
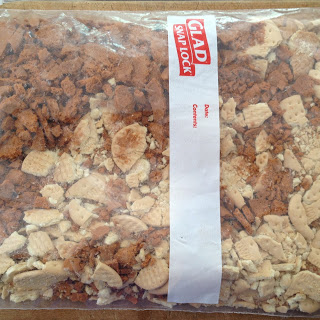
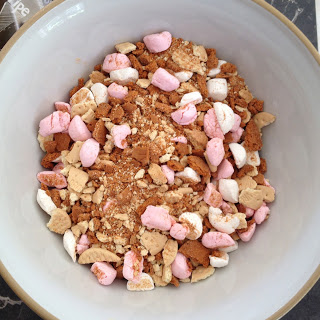
Meanwhile, crush the biscuits in a large snap lock bag or a double lined plastic shopping bag using a rolling pin. Crush until the average fragment size is around 2cm or less.
Mix the crushed biscuits in with the chopped marshmallows.
Line a 20x30cm baking tin with baking paper.
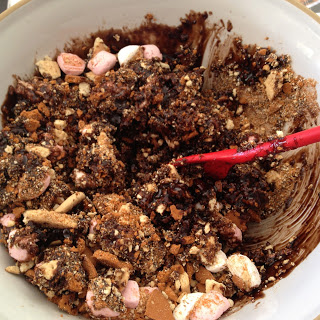
Pour the liquid mixture into the bowl of biscuits and marshmallows and stir until evenly combined.
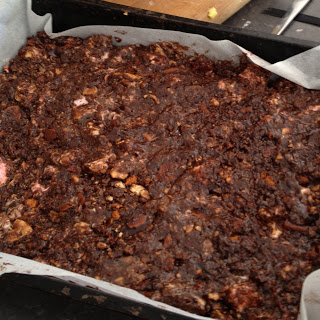
Using damp hands, press the mixture into the prepared tin.
Refrigerate the slice for two hours before icing.
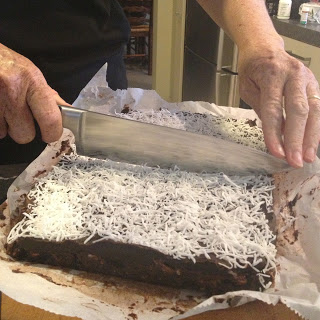
To make the icing, mix the ingredients (minus the coconut) together using a bit of hot water to loosen the mixture until it is pourable but still thick.
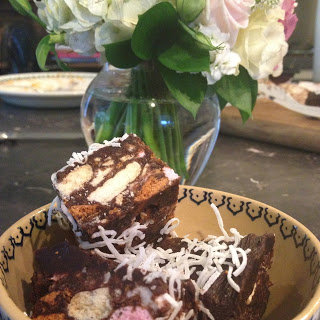
Spread the icing over the slice then sprinkle over the coconut.

Return to the fridge for another hour or so before slicing.
Enjoy at your next beach picnic!

Slices are the perfect picnic treat. They can be packed up in plastic containers and safely make their journey to a favourite picnic spot. In my family that picnic spot is anywhere that has sand (much to the annoyance of Dad) and an ocean.
Slices are durable and sharable. They don't need fancy plates, forks or accompaniments, just fingers and a mouth.
We often make up slices and pop most of them in the freezer so that the next time we head off for a day at the beach we can put out a slab, chop a bit off and go.
In the case of this slice, half went into the freezer and the other half I took on up to Nana's for morning tea :).
The one problem with Summer is the heat. Most slices have butter in them which means as the temperature rises they start to become soft and sometimes even melted. Unfortunately with this slice, it needs to be transported in the presence of a couple of ice packs. Then again, how many of us go to the beach without ice packs in our chilly bags/bins anyway.
This recipe comes from the Ripe Recipes book by Angela Redfern. It contains all the recipes for the delicious treats that can be found at the Ripe Deli on Richmond Road (hence why this is called Richmond rocky road slice) in Auckland. Out of all Mum's recipe books, this is the one that she has used the most and made the most things out of. Every week or so there is a new surprise coming out of the kitchen which had its origins in this book.
This isn't your typical rocky road, it is more of a fridge set biscuit slice. Actually, it is a biscuit fridge set slice. The only point of difference is the presence of malt biscuits and marshmallows. It doesn't involve actual chocolate either, just cocoa, butter and sugar which makes it a cheaper option that the traditional chocolate laden rocky roads out there.
This is great if you have some built up tension that needs to be worked out as you get to bash the crap out of a poor little bag of biscuits with a rolling pin. Make sure the bag is double lined or else it might split, resulting in more stress and a whole lotta mess!
Rocky Richmond Road Slice
Adapted form the Ripe Recipe's cookbook by Angela Redfern
250g malt biscuits, crushed
250g super wine or arrowroot biscuits, crushed
250g marshmallows, roughly chopped
200g butter
1 cup caster sugar
3 tablespoons cocoa
3 large eggs, lightly beaten
icing:
1 1/2 cups icing sugar, sifted
2 tablespoons cocoa, sifted
50g butter, meted
2 tablespoons lemon juice
1/2 cup threaded coconut
In a saucepan, melt together the butter, caster sugar and cocoa until smooth. Add the lightly beaten eggs whilst stirring briskly and cook for 5 minutes, stirring constantly. Turn off the heat and leave to cool for 10 minutes.
Meanwhile, crush the biscuits in a large snap lock bag or a double lined plastic shopping bag using a rolling pin. Crush until the average fragment size is around 2cm or less.
Mix the crushed biscuits in with the chopped marshmallows.
Line a 20x30cm baking tin with baking paper.
Pour the liquid mixture into the bowl of biscuits and marshmallows and stir until evenly combined.
Using damp hands, press the mixture into the prepared tin.
Refrigerate the slice for two hours before icing.
To make the icing, mix the ingredients (minus the coconut) together using a bit of hot water to loosen the mixture until it is pourable but still thick.
Spread the icing over the slice then sprinkle over the coconut.
Return to the fridge for another hour or so before slicing.
Enjoy at your next beach picnic!
Birdseed Slice
Mum told me I wasn't allowed to bake when I got home.
I had been home 6 hours before she asked me if I wanted to make a birdseed slice from the Ripe Deli cookbook. So much for not baking. Apparently this is Mum's substitute for buying muesli bars. They have seeds in them. That is her justification.
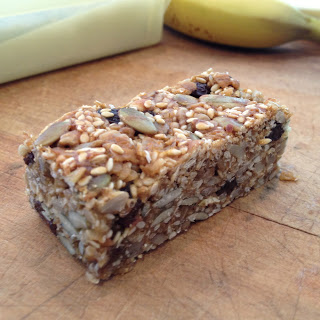
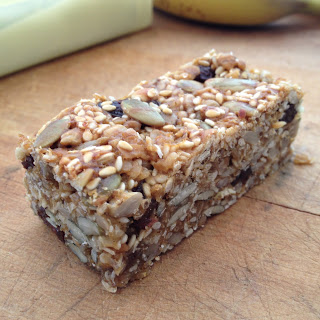
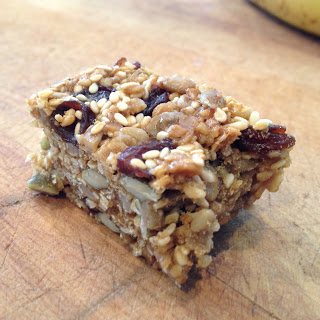
I had never tried this slice before. It is full of seeds and oats and raisins so you could almost convince oneself that it is a healthy snack (provided you ignore the peanut butter, butter and sugar that goes into it).
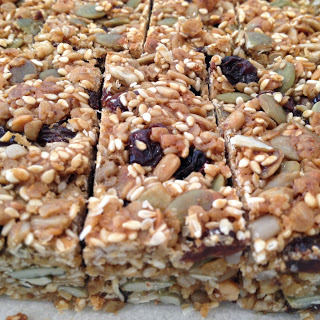
If you have braces, don't eat this slice haha. The seeds get stuck in even my braceless teeth!
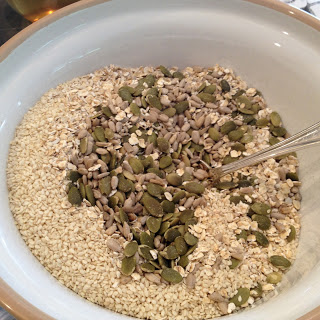
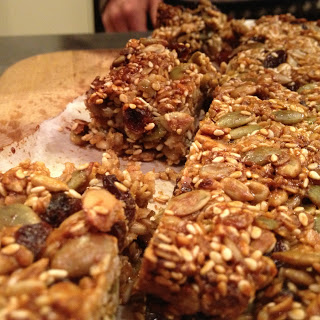
I recommend visiting the bulk bins for this slice, it will be cheaper and easier than buying individual packs of seeds. You need 450g of seeds! Yes that seems like a lot so I recommend making this at home when the parents are paying haha.
This recipe came from the Ripe Recipes book, it is filled with all sorts of wonderful delicious things. I have put the book on my Christmas list! There is this brioche recipe that I am keen to try in it. I digress, where were we? Ah slice.
This recipe follows a similar method to ANZAC biscuits so no creaming of the butter and sugar is required and it is really quick.
Birdseed Slice
Adapted from Ripe Recipes
Makes around 30 small bars
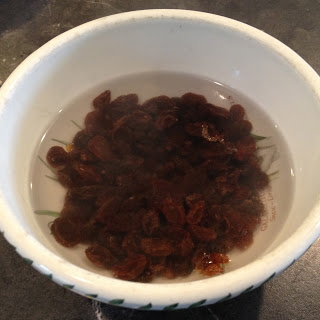
150g raisins, soaked for 20 minutes in boiling water
90g butter
1/2 cup golden syrup
1/4 cup brown sugar
90g peanut butter
150g rolled oats
150g pumpkin seeds
150g sunflower seeds
150g sesame seeds
(you could even add some dark chocolate chips if you wanted)
Preheat the oven to 170 degrees.
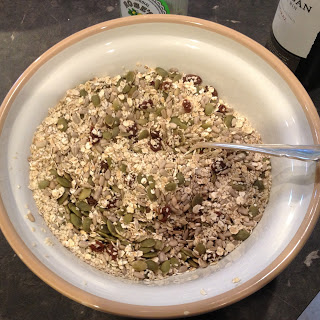
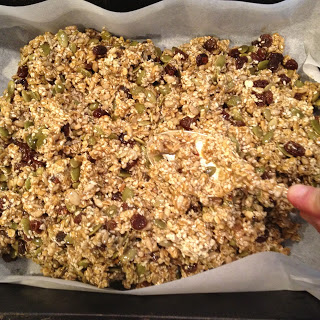
In a medium sized bowl, mix together the oats, seeds and raisins.
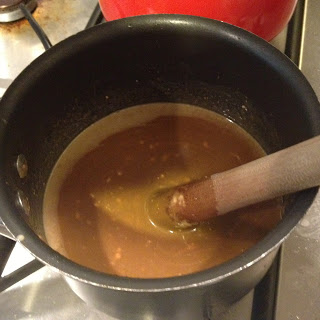
In a small sauce pan on a medium heat, melt together the butter, peanut butter, brown sugar and golden syrup. Heat and stir until the mixture is combined and smooth.
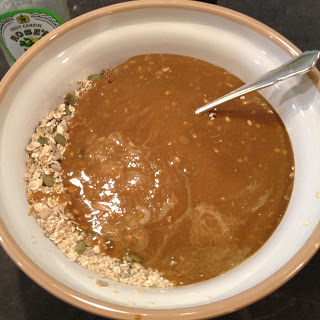
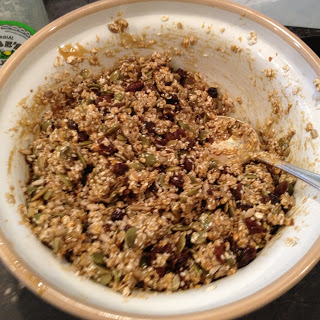
Pour the liquid into the bowl of seeds. Mix to combine evenly.
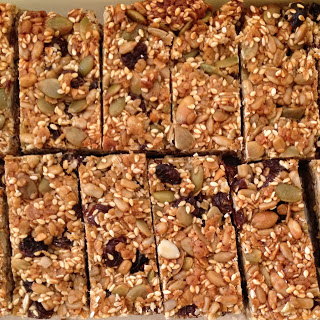
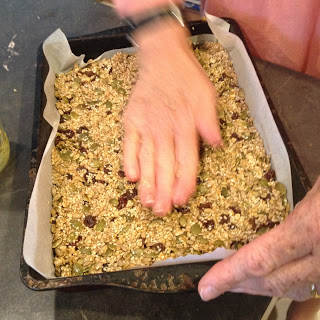
Press the mixture into a 20x30cm slice tin that has been lined with baking paper.
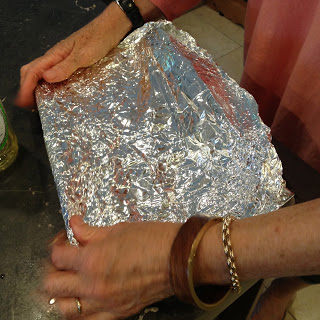
Cover the baking tin with tin foil and bake for 15 minutes. After the 15 minutes is up, remove the tin foil and bake for a further 15 minutes.
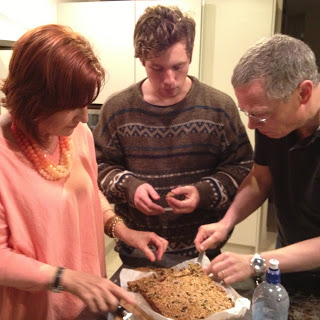
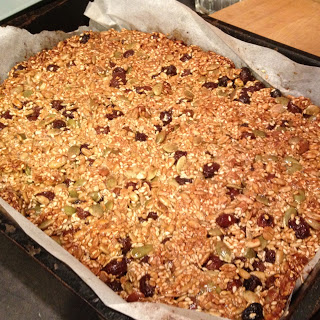
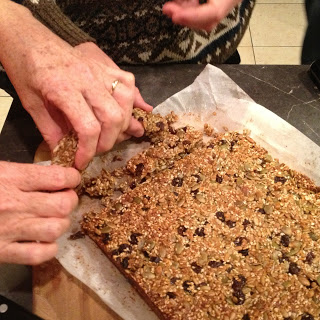
Leave to cool and place in the fridge and leave to get really cold before slicing, or else it falls apart (as you can probably see when we all became impatient only an hour after it was made).

These make a great morning or afternoon tea snack! Have with a nice big cup of tea and try to resist eating the whole container!

Sophie x
I had been home 6 hours before she asked me if I wanted to make a birdseed slice from the Ripe Deli cookbook. So much for not baking. Apparently this is Mum's substitute for buying muesli bars. They have seeds in them. That is her justification.
I had never tried this slice before. It is full of seeds and oats and raisins so you could almost convince oneself that it is a healthy snack (provided you ignore the peanut butter, butter and sugar that goes into it).
If you have braces, don't eat this slice haha. The seeds get stuck in even my braceless teeth!
I recommend visiting the bulk bins for this slice, it will be cheaper and easier than buying individual packs of seeds. You need 450g of seeds! Yes that seems like a lot so I recommend making this at home when the parents are paying haha.
This recipe came from the Ripe Recipes book, it is filled with all sorts of wonderful delicious things. I have put the book on my Christmas list! There is this brioche recipe that I am keen to try in it. I digress, where were we? Ah slice.
This recipe follows a similar method to ANZAC biscuits so no creaming of the butter and sugar is required and it is really quick.
Birdseed Slice
Adapted from Ripe Recipes
Makes around 30 small bars
150g raisins, soaked for 20 minutes in boiling water
90g butter
1/2 cup golden syrup
1/4 cup brown sugar
90g peanut butter
150g rolled oats
150g pumpkin seeds
150g sunflower seeds
150g sesame seeds
(you could even add some dark chocolate chips if you wanted)
Preheat the oven to 170 degrees.
In a medium sized bowl, mix together the oats, seeds and raisins.
In a small sauce pan on a medium heat, melt together the butter, peanut butter, brown sugar and golden syrup. Heat and stir until the mixture is combined and smooth.
Pour the liquid into the bowl of seeds. Mix to combine evenly.
Press the mixture into a 20x30cm slice tin that has been lined with baking paper.
Cover the baking tin with tin foil and bake for 15 minutes. After the 15 minutes is up, remove the tin foil and bake for a further 15 minutes.
Leave to cool and place in the fridge and leave to get really cold before slicing, or else it falls apart (as you can probably see when we all became impatient only an hour after it was made).
 |
| If you slice it too soon after baking it falls to bits! |
These make a great morning or afternoon tea snack! Have with a nice big cup of tea and try to resist eating the whole container!
Sophie x