Black Bottomed Cheesecake Cupcakes

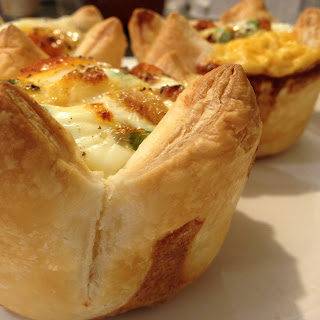
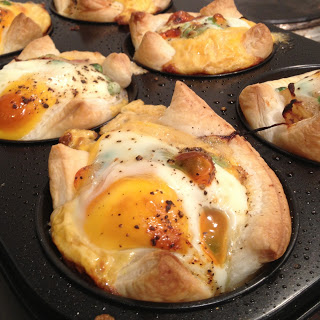
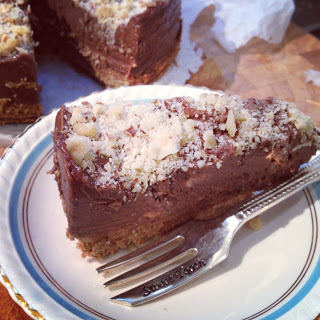
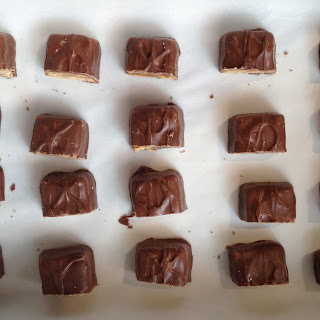
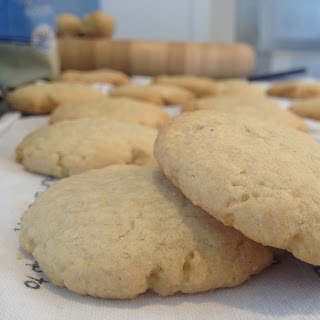
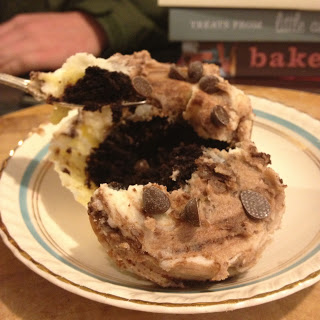
Also known as the ugliest cupcakes you will ever lay your eyes on.


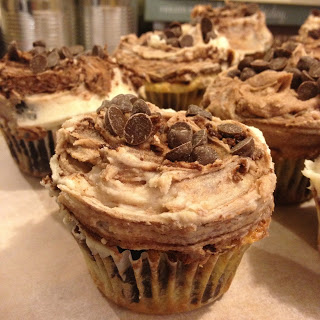
That was intentional. They were never gonna be beautiful. Just like my feet were never going to be foot models (thanks Mum).

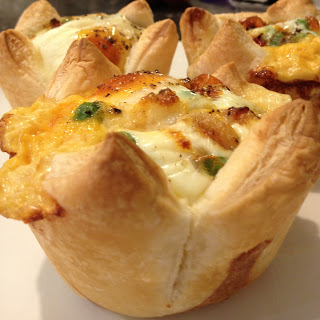
Sean said to claim them as being rustic. So I will.


I had a bit of a cruisey day today. I can only do lab work every four days at this stage so once I did all my prep I had the afternoon free to apply for a job, pay a power bill and twiddle my thumbs. I decided that I should probably pay a bit of attention to my wee blog. It has been a bit neglected really. I kind of went to Hawaii for 10 days, then I had a whole heap of stuff to do at uni and then I guess I have been in a bit of a baking rut, making the same things over and over again. I offered the chem honours kids that I would bring them in something so it was a perfect opportunity to try something new and to blog about it.


Now to be honest with you, these didn't go as expected. I made up the cheesecake mixture and it was such a failure. It was sloppy and not smooth and fluffy like it was supposed to be. It was somewhat lumpy also. Not ideal. I was also not prepared for the eggless sponge batter. It was the strangest recipe I have ever made. I put the first lot in with little faith in the outcome. But you know what? They didn't turn out half bad so we gobbled them all up and I gave them another go with the left over cheesecake mixture applying what I had learnt from the first lot. The cheesecake mixture was still a mess. Let me know if it works out alright for you.


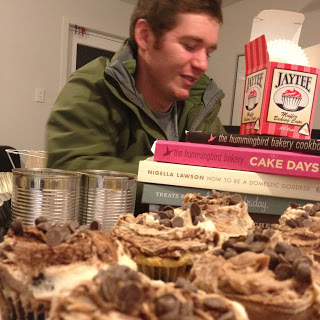
Goodness, I made so many adjustments. I hope I can remember them in (slash guess how much extra I threw in). This was originally a Hummingbird Bakery recipe. This is the second cupcake recipe that has turned out a little suspicious. My trust in them is being compromised but I shall remain loyal.

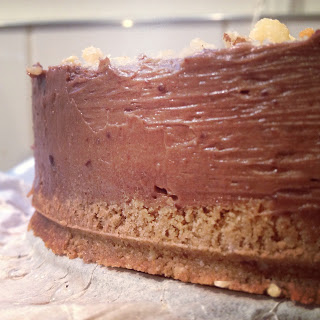
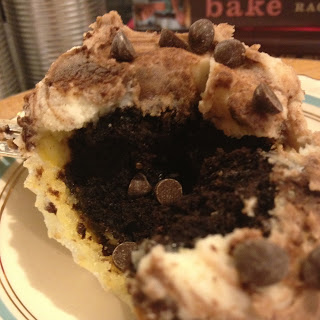
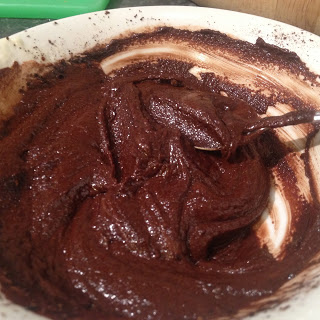
The sponge of this cupcake is excellent and rich. It is also quite dense. For those of you who have ever made a mug brownie, this is basically the same thing.

Changes I made:
Add the yolk and only half the white to the cheesecake mixture
Add in about a quarter of a cup of icing sugar to the cheesecake mixture also
Add 3 tablespoons of oil instead of the three
Add 1/2 cup plus say 2 tablespoons of water to the sponge batter
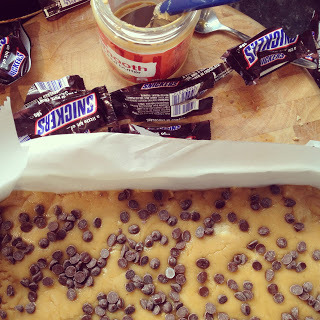
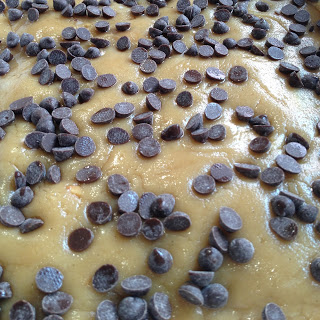
Added chocolate chips to the sponge (hey why not?)
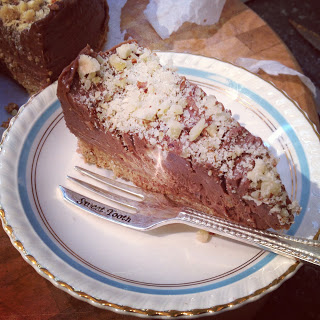
I made up a cream cheese icing then separated off a little and mixed in 5 squares of melted dark chocolate then marbled this through to create an even messier effect.
I also added small half teaspoon amounts of plain cream cheese to each cupcake case, just to break up the sweetness a little.


Black Bottomed Cheesecake Cupcakes
Adapted from the Hummingbird Bakery Cookbook
makes 11-12

For the sponge:
190g plain flour
120g castor sugar
40g cocoa
1/4 cup chocolate chips
1/2 teaspoon baking soda
1/2 cup + 2 tablespoons water
1 1/2 teaspoons white vinegar
3 tablespoons sunflower oil
1 teaspoon vanilla essence
pinch of salt

For the cheesecake filling:
140g full fat cream cheese
60g castor sugar
1/4 cup icing sugar
1 yolk + 1/2 egg white
1 teaspoon vanilla

Cream cheese icing:
50g butter, softened
60g cream cheese
3 cups icing sugar
5 squares dark chocolate
1 teaspoon vanilla

Other:
6 teaspoons cream cheese


Preheat the oven to 180 degrees on bake and line a muffin tray with paper cases.

Filling:
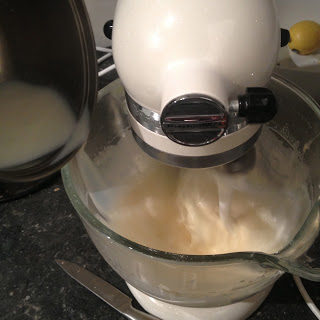
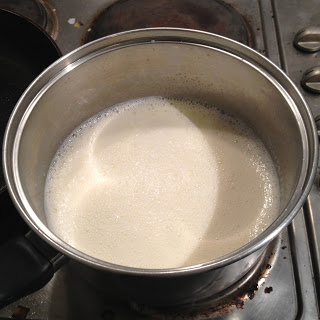
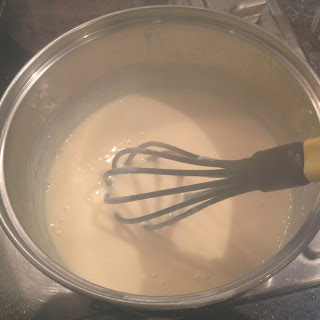
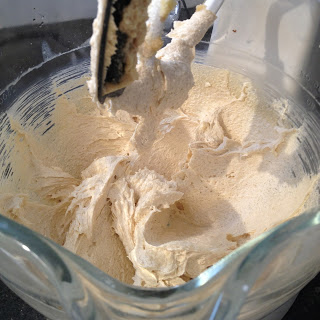
In a mixing bowl, beat together the cream cheese, vanilla, castor sugar and icing sugar. Slowly add in the egg and mix until smooth and creamy (hopefully). Set aside.

Sponge:
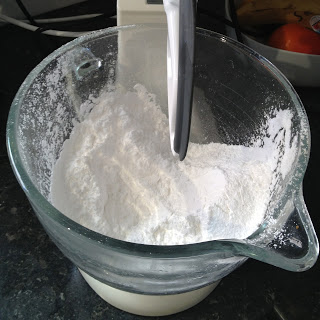
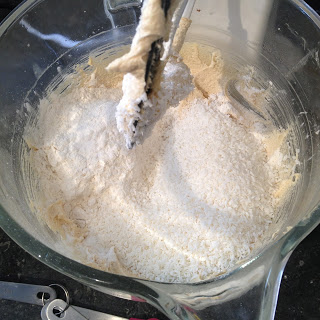
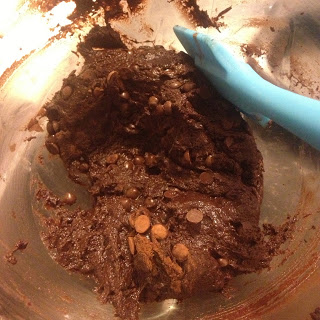
Mix together all the dry ingredients (flour, sugar, cocoa, chocolate chips and baking soda).

In a jug, mix together all the wet ingredients (oil, water, vinegar, vanilla).

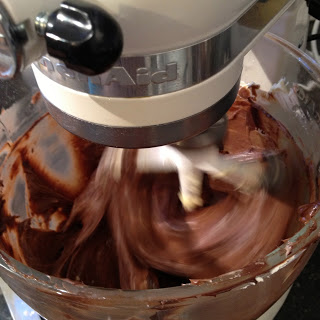
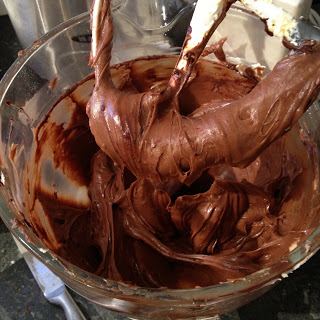
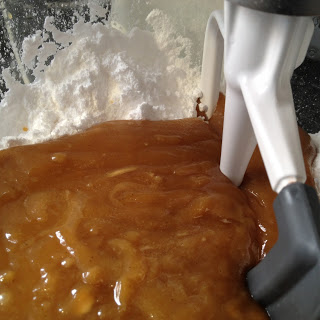
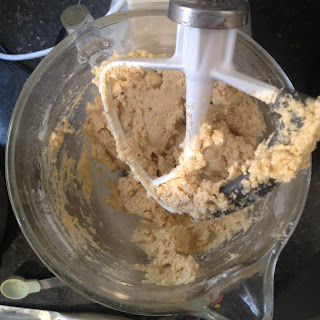
In a free standing mixer, gradually add the liquid mix into the dry and mix until the batter is thick.


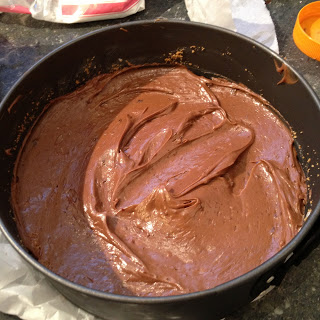
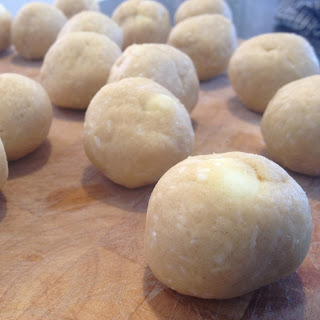
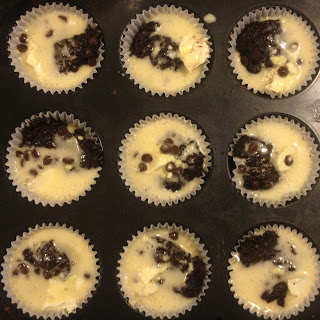
Spoon dessert spoonfuls of the batter into each cupcake case. Spoon half a teaspoon of cream cheese into the bottom of each case also. Next, spoon a tablespoon or two (as much as fits) of the cream cheese mixture into the cases. Try not to fill too high (leave 6mm space) or else the cheesecake mix overflows.


Bake for 20-22 minutes or until the cheesecake looks set and is no longer 'eggy' looking.


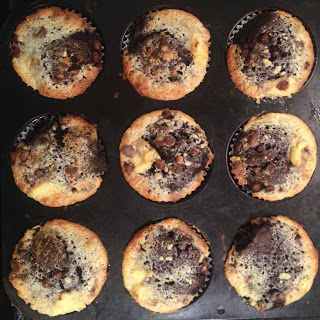
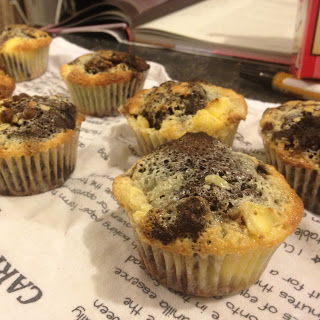
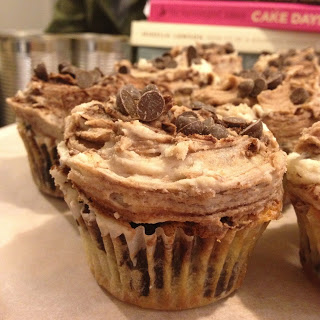
As you can see, these are pretty hideous looking.

Leave to cool before icing.

To make the icing, cream together the cream cheese, butter and icing sugar and vanilla until light and fluffy. Melt the chocolate using small bursts in the microwave. Stir this chocolate into a small bowl with about half a cup of the cream cheese icing. When spreading the cream cheese icing over the cupcake, dip the edge of your spatula in this chocolate icing and swirl it around to create a marbled effect.


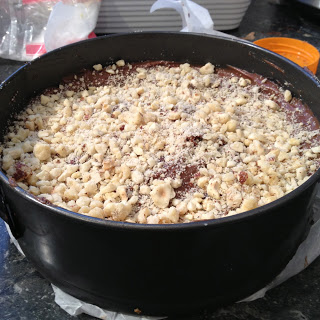
Sprinkle over with chocolate chips if you wish.


Enjoy!!


Orange and Lemon Polenta Poppy Seed Cake

I am supposed to be sleeping, getting ready for a long flight to Hawaii in the morning.

But no, I cannot leave on holiday without first getting my affairs in order (ie posting for both of my blogs).

I made this cake last week with my excellent cousin Georgia. We were lacking in a car to drive places and we both kinda felt like cake.

For Mum's birthday Jack and I bought her the new Ripe Deli book

Ripe Recipes: A fresh batch.

Boy is it a great book! I have photocopied what seems to be every second page.

Amongst the wonderful recipes in this book was a recipe for gluten free orange and lemon polenta loaves.

They looked so moist and excellent in the picture. We had polenta, and ground almonds and plenty of oranges and lemons! The only thing we didn't have were the two loaf tins required. So we decided to turn this into a cake. And a large cake at that.

We used a 23cm round tin with decently high sides. The cake rose right to the very top! It was seriously the tallest single layer cake I had ever seen. It was really impressive looking. The high fat content also ensured the cake's easy removal from the tin. Overall making this cake was almost as much of a dream as that heart shaped feijoa cake a few weeks back.

This recipe was supposed to have chia seeds in it. We used poppy seeds instead. Sure they don't have all the super nutrients that chia seeds supposedly have but they give the same speckled effect.

Polenta comes from very finely ground corn, hence why this cake is gluten free (provided you use maize corn flour and gf baking power). The polenta lends quite a corny taste to this cake as well as a soft gritty texture. It is interesting and strangely addictive. The moistness of this cake is to die for. Make sure you put plenty of zest lemon icing on the top as well! We were too impatient to munch on cake while watching a movie so the warm cake caused the icing to dribble everywhere but really at the end of the day who cares?

We found the method of this cake really really weird. You have to boil the oranges and lemon for ten minutes then whizz them up in the blender to a pulp. Then this all gets added to the cake. Adding to the moistness I suppose.

Are you uncomfortable with the number of times I have said moist in this post so far?

Tehe.

Orange and Lemon Polenta Cake with Poppy Seeds

Makes one very tall 23cm cake

2 oranges, topped and tailed so that they can stand without rolling around in the saucepan.

1 lemon, topped and tailed

1 1/4 (210g) cup finely ground polenta

1/4 cup (35g) cornflour

1 cup (100g) ground almonds

2 teaspoons baking powder

3 tablespoons poppy (or chia) seeds

250g butter, softened

2 cups (440g) castor sugar

1 teaspoon vanilla

6 large eggs

Preheat the oven to 160 degrees on bake.

In a medium sized saucepan, place the oranges and lemon and then pour in boiling water until it reaches two thirds of the way up the fruit. Boil for five minutes, flip over the fruit then boil for another five. Remove from the water and set aside to cool a little.

Cream together the butter, sugar and vanilla. Add the eggs one at a time until the incorporated and fluffy.

In a separate bowl, mix together the polenta, almonds, corn flour, baking powder and poppy seeds.

In a blender or small food processor, blend the oranges and lemon to a smooth pulp.

Add a cup of the dry polenta mix and a few dollops of the pureed fruit mix to the butter-sugar-egg mix and mix until incorporated. Continue adding the polenta and puree alternately until it has all been mixed in.

Pour the mixture into a large, tall, lined and greased cake tin.

Bake for an hour then cover the tin with tin foil and bake for a further 30-40 minutes or until a skewer comes out clean.

Leave to cool before removing from the tin.

Once fully cool ice with a lemon glaze:

25g melted butter

2 cups icing sugar

juice of 1 lemon

Enjoy!

Coconut Ice Cupcakes

Ice ice baby.

Well that is what should be falling from the sky tomorrow. Hopefully.


I really should have been doing some research for my next assignment due after the holidays but my brain just couldn't cope. So instead I baked. The only problem with said baking is that most of my friends have gone off home and so finding people to give these fellas a home is proving a challenge. So I decided that because tomorrow was likely to be such a terrible (or wonderful depending which way you look at it) day weather wise that these popping up in the Applied Science tearoom would go down a treat.


Hey we are a food science department, we have a bit of an affinity for food funnily enough.

Blogging about Cupcakes I do believe is a nice change. I haven't made any in a while. In fact I think the last time I made cupcakes was actually the lamington cupcakes that I posted here. Man they were good. Haha and also were covered in coconut.

I took the basic Hummingbird Bakery vanilla cupcake recipe and added a quarter of a cup of desiccated coconut and a few drops of coconut essence to the sponge. I then added more coconut essence as well as some strawberry essence to the icing. Oh then chopped up some coconut ice that I picked up at the supermarket from the bulk bins to place on the top of them.


Here are the flavourings I used. Oh and that's Dad in the background. Hi Dad.


So as you can see, they are not tricky at all!

I am just really liking the effect of the coconut on the top. I used both threaded and desiccated for that.

Also, because they are supposed to look quite rough (come on who has ever seen a perfect piece of coconut ice before?) it doesn't matter what the icing beneath the coconut looks like, in fact I think the rougher the icing the better the effect. It almost gives it that whipped, cloud-like look.


I can't wait for my little cousin Lulu to have big birthday parties. Haha I think I will end up going a little over the top with them!

Remember you can add more or less coconut essence, more or less strawberry essence and more or less pink food colouring to the sponge according to your own preferences.


Coconut Ice Cupcakes
Adapted from the Hummingbird Bakery Cookbook 
Makes 12

40g butter, softened
140g castor sugar
120g plain flour
1 1/2 teaspoons baking powder
1/2 cup full fat milk
1 large egg
1/4 cup desiccated coconut
a few drops coconut essence
1 teaspoon vanilla essece

Icing:
50g butter, softened
3 cups icing sugar
up to a quarter cup of milk (add it gradually until you achieve a fluffy consistency)
a splash of vanilla essence
few drops of coconut and strawberry essence
pink food colouring
threaded and/or desiccated coconut to cover
coconut ice to decorate

Preheat the oven to 180 degrees Celsius and line a muffin tin with cupcake cases.

Mix together the butter, sugar, coconut, flour and baking powder until a fine, sandy consistency is reached.

Gradually add in half of the milk and mix until combined. Crack in the egg, beat until combined then mix in the remaining milk plus the coconut and vanilla essences. Mix until combined and smooth.

Spoon into the 12 cases and bake for 20-25 minutes until the tops are golden.

Let the cakes cool completely before icing.


To make the icing, cream together the butter and icing sugar, add small amounts of milk to loosen the mixture up. Add in the essences and pink food colouring until it meets your desired shade of pink. Keep beating until the icing is really voluminous. It should not be runny at all ie it should form stiff peaks.

Spoon this icing onto the cool cupcakes and using a knife or palatte knife, smooth the icing into a swirl. Don't worry if it doesn't look perfect. Imperfection is the new perfection. Natural looking is far more pleasing to the eye.

Sprinkle (or totally drown) the cupcakes with the coconut and decorate with the coconut ice (I chopped mine into smaller cubes).


Stand back and marvel at how terribly girly everything looks and curse at your previously spotless floor that is now covered in icing sugar and coconut.

Enjoy!!

x


Apple and Rhubarb Crumble


Ready for a rumble with some crumble?

Yes. Yes you are. 


I decided that since we Scarfies are near the end of our exams and there is apparently a snow storm on the way, that a nice big comforting heapful of my Mum’s crumble would go down a treat.

For some reason (snobbery, blatant favouritism and bias) I have never had a crumble better than Mummy Edmonds’ crumble. You know what, I actually think the only difference between hers and everyone else’s’ is that she throws in a few slivered almonds. I dunno, it just tastes great.

I still can't believe there is gonna be another snow storm. Man. I'll be all alone in my little cold flat. Slash i'll be slaving over reports that are due in the warm library. But still, snow storm days are good stay inside and snuggle with someone days. Snuggles, tea and crumble. Sounds ideal if you ask me. Haha but alas, #Foreveralone.


Even with crumble like this. 

This crumble must be served with custard and/or whipped cream and/or ice cream. 


You can make your own custard using egg yolks, sugar and milk, you could buy your custard or of course whip out the old Edmonds custard powder and do it that way. I really do not mind how you get your custard fix. The important thing is that there is custard.

For those of you wanting to venture into the land of homemade custard, I will show you the way. 

It is really quite easy. It uses a fair bit of milk though. But milk has protein. And calcium. It's basically a super food. 

Love how I justify custard?


Right, so this has to be the easiest dessert to make. So you have no excuses not to be bothered to make it. I ended up using two very large apples and one small granny smith plus two stalks of rhubarb for the filling. The thing with this is that you can alter your topping to filling ratio to suit your needs. Usually I only make a topping of three quarters what I list below but the baking dish I used was a little on the large side, and crumble topping I believe naught to be spread thinly.


You can also add whatever sort of almonds you like. You don’t even have to add them if you don’t want too. Chopped, slivered, flaked, you name it. Use them. You can also add up to a cup of the rolled oats and coconut. I like the texture of them in the topping. They also bulk out the topping nicely, making it go further for the same amount of butter.

Non-stick cake tins also work really well for this sort of thing. I have made one before in a 20cm sandwich tin and it worked a treat. Making mini ramekin crumbles would also be amazing! I would have done that here except I am lacking in the ramekin department.


Mummy Edmonds’ Apple and Rhubarb Crumble
Serves 4 (generously)


For the topping:
100g butter, softened, almost melted
¾ cup brown sugar
¾ to 1 cup rolled oats
¾ to 1 cup threaded coconut
¾ cup plain flour
½ packet (35g) slivered almonds (add more if you please)

For the filling:
3 large apples (any variety really)
2 long stalks of rhubarb (if you are a huge rhubarb fan feel free to add another)
¼ cup boiling water
1 tablespoon sugar
1 squeeze of lemon juice (totally optional, if you use granny smith apples you will not need the lemon juice as the acid in the apples counteract the sweet of the topping nicely)


Preheat the oven to 180 degrees on bake.

In a mixing bowl, rub together all the topping ingredients until all the butter lumps have been reduced to fine crumbs.

Peel and slice the apples into chunks. I sliced mine into wedges then halved those wedges. I find the apple pieces easier to eat with a spoon that way. Wash the rhubarb and then slice into 1cm thick pieces.

Place the apple and rhubarb in a 30x20cm baking dish. Pour over the boiling water and lemon juice and sprinkle over the sugar.

Sprinkle the crumble topping over the filling. I tend not to pack mine down as it allows the topping to be more on the crunchy side.

Once you’re happy with the distribution of your crumble topping, place the dish in the oven and bake for one hour. At 30 minutes I recommend placing a sheet of tin foil over the baking dish to prevent the topping from going too brown. Remove the tin foil five minutes before removing from the oven. Also, remember the smaller the dish the shorter the cooking time. Also, the cooking time may be longer if you decide to throw a bit more fruit into the filling.


When the crumble is halfway cooked, you can start making the custard.

Vanilla Custard
Makes 2 cups
500ml full fat milk (I used trim, it works but some people like the creamy custard flavour that the full provides)
2 whole eggs
2 egg yolks
1/4 cup castor sugar
1 teaspoon vanilla essence - vanilla bean paste works far better
3 tablespoons flour

In a medium sized sauce pan on a medium heat, warm up the milk to just below simmering.

Beat together the eggs, yolks, sugar and flour until thick and pale.

When the milk is just below simmering, gradually pour the milk into the mixing bowl, beating slowly until it is all combined. 

Return this mixture to the saucepan, and on a low heat and whisking constantly, heat until the custard thickens to your desired consistency. DO NOT BOIL! The milk will curdle and you will have a right gross mess on your hands.


Pour all over the crumble and devour with gusto! 


Enjoy!

Mini Bacon and Egg Pies


Never thought I would be sharing these with you. I know it's not quite cake. Please forgive me. 


Earlier this year I got to be part of the Goodman Fielder Kiwi Faves campaign where I showed the nation at prime time how I make my family’s favourite bacon and egg pie. During the filming I lost count of how many pies I actually made and by the end of the day, if I have to be honest with you, I never wanted to see another bacon and egg pie ever again. Until now of course. On the day of filming I actually got up extra early to make the crew these mini ones for breakfast. My Mum has been making these in even smaller muffin tins for yolks as finger food for when she had people round.


It was late in the afternoon when my dear friend Matt text me asking if he bought me ingredients if I could make him dinner. He needs to know by now that I will make him dinner no matter what haha, his excellent company and hilarious yarns are all that he needs to bring with him.


I had some streaky bacon, some eggs and flaky puff pastry lying around (as you do) so I offered to make these for him. 

These pies make great individual servings and you only need around two per person. Since each one contains two eggs they are rather filling and you become deceptively full even after just one. They can easily be made vegetarian by skipping out on the bacon and adding a few more veges if you wish. Some baked pumpkin would go down a treat. I added peas because we had some lying around in the freezer. Oh these make great picnic treats too! Whenever my brother wants to impress a girl he asks me to pack him up a picnic (which last time consisted of these mini pies plus mini lemon bundt cakes) to take with him.


Also, I am a huge fan of cold bacon and egg pie so the left overs  make perfect lunch time snacks!

I used a strip of streaky bacon per pie but that was only because I had a pack in my fridge that needed using up. I personally prefer shoulder bacon as it is a lot leaner than the streaky.

You will need a Texan muffin pan for this. They are only around $10 at New World and they come in handy for so many things. Unfortunately because there are only six spots in each pan you will need to do this in two batches unless of course you have two trays.


This recipe can be so easily adjusted for the number of people you plan to feed. Just allow half a sheet of flaky puff pastry, four eggs and at least a piece of bacon per person. Oh and peas. If you want peas. Although Matt managed to eat three of these. His Dad and I both think he needs to cut down on the old pie front and invest in some more vegetables but alas he is too stubborn and is convinced that energy drinks provide all the nutrition he needs! Plus all my cooking and baking probably don't help the cause either. 


Mini Bacon and Egg Pies
Serves 4

2 sheets pre rolled flaky puff pastry, cut into quarters
12 eggs
4-6 pieces of shoulder bacon
2 onions, sliced into wedges
½ cup frozen peas
salt and pepper to taste
cooking spray for the tray


Preheat the oven to 200 degrees. Spray your Texan muffin pan with the coking spray.

Slice up the bacon (into whatever shape you like) and sauté with the onion until cooked and translucent. You want that great cooked bacon flavour in your pies.

Once the pastry has defrosted gently press each square into a muffin pan. You will get a triangular edge poking out but that is ok. Make sure it is well fitted in to the bottom.

Sprinkle over the bacon pieces and onion evenly across the eight pies. Do the same with the frozen peas.

Gently crack two eggs into each pie. Don’t worry if they slightly overflow, it will all be contained within the muffin tray. 

Season with salt and pepper.

Bake for 25-30 minutes or until the pastry is golden and the egg is firm when gently pressed. Once again it doesn't matter if they are slightly undercooked. In fact, I like my egg slightly gooey. 

Serve with a good dollop of good old tomato sauce!


Enjoy!

Banana and Feijoa Cake

This cake uses probably the best cake tin I have ever experienced. I only made this cake because of this tin. I didn't care for the cake itself, I just wanted to try this baby out.

Linda at work scored the bargain of the year at the recycling shop. It was this old, massive heart shaped cake tin and she got it for a song! (ie $1!!!) Yes one dollar. I am so jealous. It is the sturdiest tin I have ever seen and looks like it has been through a war or two. It would make an excellent fruit cake. So generously she offered to let me borrow it so the next day at work I walked home with this beautiful baby in my arms (quite literally my arms were wrapped around it in a caring an loving manner).

Re-wind back to last Sunday.

My love of baking was gone. I feared I would never bake a cake again. At least never for another boy again! My secret ingredient in all my baking is love and all that was left of my love supply was a few measly stale crumbs at the bottom of the barrel (yes I usually have quite a lot of love hence the massive but empty barrel). I think what I was most annoyed about was the amount of butter I wasted on him. So annoyed! Do you know how much that stuff is going for these days?

On Wednesday I met up with my friend Evan for coffee and he reassured me that not all boys are as dumb as what I had been believing at the time. Anyway, long story short my frown had been turned upside down and I bounced back to the lab and proceeded to have an excellent day (despite being up to my elbows in a very foul smelling milk experiment).

To say thank you for this restoration of faith and to celebrate my renewed stash of baking-grade love I decided to bake a cake.

Well it turned out to be nine cakes.

Nine small cakes.

We had debated the merits of the old feijoa (for those who don't know what a feej is, google it). I am not a fan of the feej but Mr Evan is. A compromise was made when it was decided that the best way to eat a feej is in a feijoa and banana cake.

So feijoa and banana cake it was going to be.

I wanted to use a Texan muffin pan to make large but still individually portioned cakes. I made a single banana cake recipe and it managed to fill nine patty cases really rather nicely.

They turned out wonderful. But alas I did not take any photos of them.

It was a shame to waste such a good cake recipe and not share it with you guys so out of duty I decided to make another.

Fast forward to Saturday.

I had this tin. It was marvellous. I needed a good reliable cake that was going to stay moist and luscious.

Enter my friend Lars.

It was a Saturday night, neither of us had anything cool to do so I was like, hey, come over and lets bake a cake then you can take it back to your flat. Win win. I get to blog about a cake and not have to eat it all myself and his flat gets a cake. It was a perfect arrangement. And I have to say he is the best banana and feijoa masher I have ever seen.

This is Lars. Does he not have the most excellent mop of hair ever?

He thought he was fast enough to avoid being snapped. Guts for him.

#Larshasluscioushair

I had to make a double recipe, just so that it would fill the tin a few centimetres deep!

Basically all you have to do is add a few extra feijoas to the mix and you are good to go. They were really expensive at the supermarket so we only added six to the entire cake. I would suggest at least five good mushy ones for each cake recipe you make (as in I really should have added around 10 feijoas to mine).

The moment this cake came out of the oven was one of the proudest of my cake making life. The top was so flat, it had pulled ever so slightly away from the edges making removing it a dream!

Then we just simply iced it with a light and fluffy vanilla buttercream icing and we were good to go!

If you are doing a really large cake and you double this recipe, reduce the temperature to 170 degrees and increase the bake time to an hour to seventy minutes testing with a clean knife every ten minutes from the fifty minute mark. Cooking time will depend on depth of cake. If the top gets too brown, cover with tin foil and return to the oven.

Banana and Feijoa Cake

a single recipe for a normal 23cm cake

125g butter, softened

3/4 cup brown sugar

2 eggs

1 teaspoon vanilla

1 1/2 cup plain flour

1 1/2 teaspoons baking powder

1 teaspoon baking soda

3 small mushy bananas, mashed

5-6 very ripe feijoas, mashed

Preheat the oven to 180 degrees and line and grease your cake tin.

Cream together the butter and sugar until light and creamy. Add in the eggs one at a time and beat until as fluffy and voluminous as it can get. Add in the vanilla and mix.

Mix in your mashed banana and feijoa.

Sift in the flour, baking powder and baking soda and gently mix until just combined but the batter is smooth and there are no flour lumps.

Pour the mixture into the prepared tin, smooth out and bake for 35 minutes or until a clean knife or skewer comes out clean.

Once the cake has completely cooled, ice with a simple vanilla butter cream.

Cream together 40g softened butter with three cups of icing sugar a teaspoon of vanilla and a wee splash of milk. Beat until fluffy. You can add more milk if its not smooth enough or more icing sugar if you need a bit more icing.

Slap this on the cake and you are now ready to consume! And consume you certainly will as this cake is so moist!

Enjoy!!!

Oh yeah, this cake is great for breakfast too!

Date and Apple Crumble Cake

Hello hello.

I have been feeling as though a chocolate/nutella/peanut butter/brownie/cookie cleanse is in order.

I know, don't shun me! You will forgive me once you have tried out this cake.


Ok so there was me 7pm on a Friday night up to my ears in the most foul smelling, off milk you could ever imagine (yay for honours!) when my good friend Jelley came to visit me in the lab. We decided that since we were both being incredibly antisocial and lame for a Friday night in the prime of our lives that we should probably compensate with ice cream and baking of some sort.

So after stocking up on treats at the shop in the link (we needed snacks to buy snacks) we stopped off at Kmart first to see what new wares I could purchase for $2. After leaving with a new blue spatula, some egg rings (for making crumpets in) and another packet (or two) of M&Ms (hey we needed more snacks for the trip to New World) we set off towards my happy place (aka the supermarket).

There we purchased all the necessary ingredients for an ice cream binge and an almond and apple cake.


I had spied a recipe of Donal Skehan's recipes a month or so ago for a yummy looking cake. However I regret to inform you that it did not work out so well. I feel as though my eggs were a tad on the old side so a lovely smooth batter did not form. It was still delicious. Especially for breakfast the next day when heated in the microwave.

I had not given up on the mighty apple cake though! I had seen a delicious looking cake in Julie Le Clerc's Favourite Cakes book. It had a crumble topping and looked delicious and moist.


Buuut I made some adjustments.

A lot of adjustments now that I think about it.

I added apple slices rather than grated apple.
I added chopped dates rather than sultanas.
I used my Mum's crumble topping rather than the one suggested.
I added like a tonne more spices.
Used a totally different method
Aaand I made it into a rather tall 20cm round tin rather than the large, flat rectangular number as suggested.

So basically it is a totally different cake. Sort of.

I would definitely say use a larger spring form cake tin if you have one. This cake took a good hour and a bit to bake (I kinda lost track of time). This cake was rather tall and so the centre took quite a while to bake at I feel the detriment of the outer portion of cake. If you do end up over cooking your cake, pop a piece in the microwave and pour over some custard or a dollop of cream and all will be rectified!


I actually wish I had custard for this. That would have been amazing.

So let me try and remember what I threw into this cake :)


Apple and Date Crumble Cake
adapted from Julie Le Clerc's Apple Crumble Cake in her book Favourite Cakes

125g butter, softened
1 cup firmly packed brown sugar
2 eggs
1 teaspoon vanilla
2 teaspoons cinnamon
1 teaspoon ground ginger
1 teaspoon mixed spice
1/4 teaspoon ground cardamom
1/4 teaspoon ground nutmeg
1 1/2 cups flour, sifted
1 tablespoon baking powder
1 cup milk
1 cup dates, chopped
1 cup rolled oats
 apples, peeled, cored and sliced

for the crumble topping (you may need to increase the amount of topping if you use a larger tin)
50g butter, softened
1/2 cup brown sugar
1/2 cup flour
1/2 cup rolled oats
1/4 cup almonds, slivered or flaked, up to you
1/2 teaspoon cinnamon


Preheat the oven to 180 on bake.

Line the base of your 20 to 25cm spring form tin (or 17x27 cm brownie tin) with baking paper. Grease the sides if you are using a round tin.

Cover the dates in hot water and leave to soften.

Cream together the butter and sugar. Once light and fluffy add the eggs in one at a time and beat until voluminous and fluffy.

Add in your spices and vanilla. Then gently mix in your sifted flour and baking powder as well as the oats and dates (which have been drained of excess water).

As you mix, slowly add in the milk until a more moist and slightly sloppy batter is formed.

Stir in the apple slices.

Spoon the mixture into the cake in and smooth flat.

Rub together the crumble ingredients with your fingers then sprinkle over the top of the cake.

Bake in the oven until cooked. Haha when this is I do not know. I would say around an hour but I would definitely start testing it at 10 minute intervals (by inserting a skewer - if it comes out clean it is done) to see if it is done after 40 minutes. If you use a bigger tin it will take less time of course. If the crumble starts getting too brown place a sheet of tin foil over the top and return to the oven.

Serve warm with a good dolloping of whipped cream, ice cream or custard! (or all three . . .)


Enjoy!

Nutella Cheesecake

Before this cheesecake I was a cheesecake virgin.


Ok half a virgin (my previous attempt at age 15 had failed miserably so I refuse to acknowledge it).

I have always been scared of cheesecake.

It always seemed too fiddly, folding whipped cream or using gelatine. It just seemed to be a set up for failure.


I have also not been much of a cheesecake fan. My Mum doesn't like cheesecake so I guess out of the following in her footsteps and the constant seeking for approval complexes that I too do not like cheesecake (that much).


Anyway, back to the story of how this cheesecake came to be.

Remember my good friend Jamal? I made him this carrot cake last year for his 20th birthday. Exactly a year later (funny how birthdays are an annual thing) I am making him another cake. This year however I had promised him a cheesecake. He loves cheesecake.


So I prepared to get out of my comfort zone and overcome my fear of cheesecake for Jamal. Because he is worth it. I wasn't too sure what type to make, it wasn't allowed to contain gelatine so it either had to be baked or heavily cream cheese based.

I saw lots of links online to delicious looking masterpieces but I wanted something simple.

I consulted my hero. Nigella.

Trust Nigella to have a wickedly rich cheesecake recipe that was simple as to do. She is a legend.


I made a few adjustments based on my life rules:

1) You can never have too much nutella. So I added a wee bit more to the base.
2) You can never have too much dark chocolate. So I melted some in.
3) Hazelnuts are good. So I put in two packets rather than the 100g required.


The only problem with adding more nutella is that you then require more than one jar. Ok to be honest I used Pams hazelnut spread because I am too poor for the real deal but it still worked. The good thing about Pams is that they have a 400g jar (which is what you need for the filling) and a 220g jar which is a perfect wee top up for all the spoonfuls that accidentally make their way into your mouth over the course of making this. So I recommend buying both. The worst part is that you have left over spread in the cupboard  . . .

You will need to toast the hazelnuts. You do this buy baking the nuts for 10 minutes at 180 degrees on a piece of baking paper. You then transfer them to a clean tea towel and rub them between it to remove the skins. The skins are bitter and you don't want them in this magical dessert. The toasting also helps to enhance that wonderful hazelnutty aroma we all know and love. Just keep and eye on them and be careful not to burn them.

Also, the best thing about this is that you only need to leave it to set in the fridge.

The only problem with this is that you need to exert patience whilst waiting for it to set.


Nutella Cheesecake
Adapted from Nigella Lawson's recipe 

Makes 20cm cheesecake

Base:
250g (1 packet) digestive biscuits
75g butter, softened,
3 tablespoons nutella (from that small jar)
40g of toasted hazelnuts

Filling:
400g nutella
100g 75% + cocoa solids dark chocolate, melted either in a double boiler or carefully in the microwave
500g cream cheese (2 tubs), at room temperature
75g icing sugar, sieved
100g toasted hazelnuts, chopped


In a food processor, grind up the hazelnuts. Then add the digestive biscuits and blast until a coarse crumb. Add in the butter and nutella and pulse until evenly distributed.


Line the base of a 20cm springform cake tin with baking paper (you trap a piece of baking paper in between the base and the outer ring). Grease the sides with butter.


Press the base mixture firmly into the base of the tin and place in the freezer to chill whilst you make the filling.


Cream together the cream cheese and icing sugar until aerated and light. Spoonful by spoonful add the nutella until it has all been added.


Very slowly add the melted chocolate whilst beating. If you add it all in at once you will melt the cream cheese.


Gently mix it together until a dark, smooth mixture lies in front of you.


Place about a half cup of this filling mixture on the base of the cheesecake. Sprinkle a small handful of the chopped hazelnuts over this. Then pour over the rest of the filling. Scatter over the rest of the hazelnuts. Cover with cling film then leave to set in the fridge overnight.


To release this from the tin, carefully pour hot water over the sides of the tin. This should melt the very outer surface slightly. Then release the spring form lever and slide the cheesecake off the base.


Enjoy!!!

Snickers Truffles

This excellent weather we are having today. By excellent I mean stormy and wild. The best kind of weather. None of this mellow sunny rubbish. I like my weather to have guts.


Funnily enough I made this fudge/truffle thing yesterday when it was boiling hot (well hot for Dunedin anyway) and beautiful sunshine. Today is a far better fudge consuming day.


I found this recipe for peanut butter fudge in the latest Donna Hay Magazine issue. It is a great issue, I can't wait to make more from it. It isn't a true fudge recipe really, it doesn't involve boiling up sugar or anything like that. It resembles the truffles I had to make for the pretzel peanut butter brownie I made a month or so ago. So I think I will call this a truffle slice rather than a fudge.


I made one small change in the recipe though.

The original didn't call for snickers bars.

Snickers bars make everything better.

Don't you agree? Ok they do unless you are allergic to peanuts.

Then they kind of ruin the party.


But anyway, I dotted 10 halved mini snickers bars along the bottom of the tray I used to set the fudge. The fridge makes them quite brittle and they kind of fell out of their fudge settings when you cut them into cubes. So I propose that next time to spread a thin layer of fudge down first then dot the half snickers bars then cover it with the rest of the truffle/fudge mix. This should hopefully contain the snickers bars a little better and prevent them from falling off.

This recipe is pretty difficult to screw up. Just make sure you sieve the icing sugar or else it will be lumpy. I used my stand mixer to mix it all together but a handheld beater or even a spoon and an enthusiastic arm would do the trick.


So. Lets do this.

Snickers Truffle Slice
adapted from Donna Hay Magazine issue 68 (April/May 2013)

150g butter, chopped
1/3 cup cream
390g smooth peanut butter
1 teaspoon vanilla extract
400g icing sugar, sifted
10 funsize snickers bars
chocolate chips for fun

Line a small slice tin (I used a small lasagne dish haha) with baking paper.

In a small saucepan, melt together the butter, peanut butter, cream and vanilla, stirring until smooth. In a large mixing bowl, sift your icing sugar.

Once the peanut butter mixture has become all nice and smooth pour it into the icing sugar and mix until evenly combined and smooth.


Cut all the snickers bars in half.


Spread about a third of the fudge mixture onto the bottom of the tin. Dot the snickers bar halves in a grid formation (4 x 5). Spoon over the rest of the mixture and smooth flat. Using a second sheet of baking paper, place it over the top and smooth the fudge really flat with your hands or a flat bottombed object.


Sprinkle with the chocolate chips and gently press them in.

Leave to set in the fridge for a couple of hours before slicing into squares.

Enjoy!


White Chocolate and Coconut Cookies

Hello all!


This is just a breather post. A non chocolate laden browniesque recipe to cleanse the palate. Ok well it is chocolate laden, but there is no dark chocolate, or snickers bar in sight! So it will do.

I feel like I need to be a bit more adventurous in my cookie baking. It is like there are only so many types you can make before you delve into what I call the 'nut-based' zone, where every other recipe contains an expensive ground nut base such as almond, or hazelnut.


I also feel that there are only so many sorts of chocolate bars bloggers can hide inside cookies before it becomes a bit crazy, a bit ott and just a bit gluttonous. I feel there are many baking blogs out there which aren't really baking blogs at all. Instead they are just methods for assembling pre-mix cakes with the confectionary isle's worth of chocolate bars into one heart attack and diabetic coma. The craft, skill and love lacks somewhat.

So maybe I will have to dive into those fancy looking almond based cookies after all.

So anyway whilst skulking the works of Donna Hay online for new recipes to try I found a recipe for coconut and white chocolate chunk cookies.

I love coconut.

I love white chocolate.

I love cookies.

We had a winner.

Although I have to say, the appearance of the final baked cookie looks nothing like the picture on her website. I wonder what happened. I wonder how she got them so excellent looking.

Regardless, they tasted excellent.

Ah, speaking of excellent, I managed to find a new cookie consumer. All my current cookie consumers (who receive snap lock bags full of cookies on a semi regular basis) are all on diets. Apparently Maxie wants his abs back. Boooo!!! But through sheer luck, my lack of social normalcy and a casual chat in the Link at uni I managed to find a new consumer. There is nothing better than gifting fresh baking to people who appreciate it. I get as much joy giving it away as I do making it, so if I can brighten someone else's day as well it is well worth it. Baking equals love folks.

I swapped the self raising flour here for an extra cup of plain plus a teaspoon of baking powder. I also added more white chocolate melts. Because you can never have too many of those.


Coconut and White Chocolate Cookies
adapted from Donna Hay
makes 25ish

125g butter, softened
3/4 cup white sugar
1/4 cup brown sugar
1 large egg
1 teaspoon vanilla essence
2 cups plain flour
1 teaspoon baking powder
150g white chocolate melts or white chocolate chopped into chunks
1 cup desiccated coconut

Cream together the butter and sugar until light and fluffy.

Beat in the egg and mix until voluminous. Mix in the vanilla.

Mix in the flour, baking powder and coconut.

Stir in the chocolate.

Roll into balls and use the palm of your hand to flatten them on the tray (lined with baking paper).

Bake at 180 for 12 minutes or until lightly golden brown.

Easy as that.


Enjoy!!